Tuesday, October 1, 2013

Breadcrumbs: an essential ingredient you've already bought

Ah, breadcrumbs. They sound so pedestrian. Something you buy in a can. But homemade breadcrumbs are a surprisingly inspired ingredient. Not to mention the paragon of thriftiness. Every time you buy a loaf of bread, you've paid for some breadcrumbs as well.

They are a cinch to make. Place any bread heels, scraps, or older slices onto a plate and let them dry out for a few days on the counter. You can mix white, wheat, baguette, or sourdough. Once dry, break them apart, whizz them in the blender, and voila. Breadcrumbs. Throw them in the freezer and they keep for months.


Breadcrumbs get frequent airtime around here. I saute them in oil and herbs to top pasta or gnocchi. They are the glue for meatballs and meatloaf. Currently, the most popular use of breadcrumbs in my house is breaded chicken. A properly breaded piece of chicken — be it cutlet or, dare I say, nugget — is a simple yet delicious meal. And it's free of the preservatives that often accompany the pre-made frozen versions. I personally like finger size, even though that's a terrible name for a food, because it has a nice meat-to-breading ratio. They can be eaten with sauce or not, with pasta or not, or on a salad. There are never leftovers. 


Proper breading technique comes down to a few principles. First, make sure the breadcrumbs are seasoned. I like a salt, pepper, and grated parmesan for chicken. Fresh or dried herbs work great. Taste the breadcrumbs before you use them — they should taste good. Second, the breading process goes a lot faster if you use one hand for the dry ingredients (flour, breadcrumbs) and one for the wet (egg). This does mean flipping back and forth, but once you get in the rhythm of it, it's pretty fast. Third, your oil should be shimmery hot before putting the chicken in, ensuring a nice seal which keeps the meat tender and oil absoprtion to a minimum. And like most recipes, getting all the ingredients and equipment set out ahead of time makes for efficient cooking.


Breaded Chicken Pieces
Serves 4

2-3 boneless chicken breasts (about 1 pound)
1/3 c. flour
2 eggs
1 t. water
3/4-1 c. breadcrumbs
1/2 c. grated parmesan
Salt and pepper to taste
Olive oil for frying

Cut chicken breasts, against the grain, into desired size pieces. In one bowl, place the flour. In a second bowl, crack the eggs and add 1 t. water. Mix them with a fork until blended. In a third bowl, mix the breadcrumbs, parmesan, salt and pepper.

Heat oven to 200 degrees F and place a tray with paper towels in it. Set a large skillet on the stove and pour enough olive oil into it to coat the bottom about a 1/4 inch deep. Heat the oil on medium high heat until the oil is shimmery.

While the oil is heating, take a piece of chicken and drop it in the flour. Shake off the excess, then drop it in the egg mixture. Turn to coat it in egg, then drop it into the breadcrumbs. Coat liberally with breadcrumbs. Repeat with enough pieces to put into the pan without crowding. 

When oil is hot, place chicken pieces in pan and cook about 4-5 minutes, undisturbed. When you can see browning on the bottom, flip the pieces and cook another 4-5 minutes. Remove a piece and cut into it to check for doneness (there should be no pink). Remove chicken pieces to the tray in the oven to keep warm. 

Repeat with remaining chicken. Add more oil if needed between batches. 

Tuesday, September 17, 2013

Corny chowder

If you ask kids to name a favorite vegetable, it's a safe bet that half will say corn. And there's nothing wrong with that. While I join many others in being alarmed at the proliferation of sneaky corn-based products in our foods, a simple ear of corn is entirely different. Corn on its own contains vitamins, protein and fiber (one ear has about 10% of an adult's fiber needs). So if corn is what a kid likes, by all means give her corn.

In the height of summer, there's nothing better than corn on the cob, especially fresh-picked and local. We often throw unshucked ears of corn on the grill to steam alongside whatever else is grilling. But I recently developed a corn chowder for a kids' cooking class, and it brings corn to a new level with only a few more ingredients. Yes, it has a few pieces of bacon in it, but it's also made with low-fat milk and thickened with potatoes. Part of what makes the flavor so rich is using the cobs in the liquid. I will admit, it made a huge mess in class — the corn kernels were flying as the kids learned how to cut the kernels off the cob. But it was a huge hit, and all the leftovers went home with the kids to share with their families.

I'm still finding corn in my farmers' market, and it's tasting so good. So make a batch of this soup and stick it in the freezer, for a cold winter night when you are craving a reminder of summer. 


Corniest Corn Chowder
adapted from Joy of Cooking

Serves 6.

5-6 ears of corn, shucked
4 pieces of thick-cut bacon, chopped into 1/2 inch pieces
1 medium onion, chopped fine
4 1/2 cups 2% milk
2-3 new potatoes, cut into 1/2 inch cubes
Kosher salt and pepper to taste
chives, chopped thin

Remove the corn kernels from the cobs with a small knife. Put kernels in a bowl and set aside. Save the cobs.

In a soup pot, cook bacon pieces over medium for about 10 minutes until they start to brown. Add onions and continue to cook another 10 minutes.

While bacon and onions are cooking, warm milk in the microwave or in a pan over medium heat. It doesn’t need to boil, but it should feel lukewarm.

After onions have softened, add potatoes, corn cobs, and milk to the soup pot. Bring to a boil, then immediately reduce heat to a simmer. Cook, covered, until the potatoes are almost tender, 10 to 15 minutes.

Add corn kernels and cook another 5 minutes until potatoes are soft. Remove corn cobs and discard.

Using an immersion blender, blend about half the soup so that the soup is thick but still has whole pieces of potato and corn.

Serve with chopped chives on top.

Tuesday, September 10, 2013

How many scallions can fit into a scallion pancake?

This summer, I had the opportunity to embark on a substantial amount of travel. For long stretches I was untethered to electronics. I ate great meals in exciting restaurants, and faced the challenges of cooking in poorly equipped rental kitchens.

But then reality hits. The laundry mounts, the work looms, and I realize that I haven't posted anything here in a looooooong time. So I'm back, cooking in my own kitchen and sharing my best recipes. 

I've been meaning to post about scallion pancakes for a while, since they are near and dear to my heart. When I first set up house in Boston sometime in the last millenium, scallion pancakes were in heavy rotation at dinnertime. Mostly because they are insanely cheap. And quick. Because we didn't have a rolling pin, we kept a clean, empty wine bottle just for rolling out the pancakes. We also didn't have any counters in that kitchen, so the rolling happened on the table where we ate.


I've been fiddling with the recipe lately, and this version goes above and beyond my 20th century attempts in terms of crispiness and flavor. But one thing is the same -- I insist on a huge, and I mean huge, amount of scallions in my pancakes. I have little interest in the pancakes that we order in restaurants, which usually contain about 6 microscopic bits of scallion in them (although my son harbors a weakness for that version). Mine contain what may seem like a shocking amount of scallions, but trust me, these pancakes can handle it.

I found a fascinating exploration of scallion pancakes at Serious Eats, which essentially confirmed what I've been doing all along. The hot water is essential to a light dough that doesn't develop much gluten. And layers create crispiness. While you can spend a lifetime trying to figure out which precise rolling technique is the best, I keep it simple. Two turns of the dough and two layers of scallions. That's it. 

Pair these with a steamed veggie and you've got a meal that's quick and inexpensive, something I appreciate at any stage of life.


The Most Scallion-y Pancakes
Makes about 16 3-inch pancakes

2 c. all purpose flour
1 t. kosher salt
1 c. boiling water
2 c. scallions (about 2-3 bunches)
Sesame oil for layering
Canola oil for frying
3 T. soy sauce
3 T. rice vinegar

Mix flour and salt in a bowl. Add boiling water all at once and mix to form a dough. If the dough is not coming together, add additional hot water, 1 tablespoon at a time, until the dough can form a ball. Turn onto a floured surface and knead for a few minutes until smooth. Cover with a cloth and let rest 20 minutes.

While dough is resting, thinly slice white and green parts of the scallions. To make the dipping sauce, place soy sauce and rice vinegar in a bowl. Set aside. 

Cut the dough into four pieces. Using a rolling pin, roll the first piece into a square, roughly 10 inches across. Place 1-2 t. of sesame oil on the top half of the square, then cover the oil with scallions. Fold the bottom half over the top half, then roll the dough again into a square roughly the same size. Repeat adding the sesame oil and scallions, fold again, and roll the dough as thin as possible without tearing it. Using a pizza cutter, cut the dough into smaller squares (or rectangles, or whatever shape is speaking to you). 

Repeat with the other three pieces of dough. (If space is an issue, as it is in my kitchen, I start frying a batch and then roll out the next one). 

Place a sheet pan covered with paper towels in the oven and heat the oven to 200 degrees F. 

On high heat, heat 1/2 inch of canola oil in a large skillet until hot (if you drop a bit of water into the pan, it should sizzle). Fry pancakes, without crowding them, until bottom side is golden brown. Flip and repeat. Remove to the warm oven, and repeat until all of the pancakes are cooked, adding additional canola oil if needed. 

Serve with dipping sauce. 

Wednesday, August 14, 2013

Picklin' Time

I've been traveling a lot this summer. I've been to many corners of the country and have had lots of great eats. But now I am home, one child is away at sleepaway camp, and to keep away the blues, I've turned to making pickles. Pickling converts any fresh vegetable into something more shelf stable. In other words, it's a way to get a blast of summer flavor when it doesn't feel summery anymore. 

Pickles are a low-input, high-output kind of activity. They don't take many ingredients or time, and last for months and months (sometimes years). I personally go through the extra step of canning my big batches using the water bath method, but they will keep for months in the fridge without going through the extra step.


Sometimes the vegetable is cooked, sometimes not. Salt and vinegar are essential, sugar and spices are optional. The sky is the limit in terms of flavor, but I started this year with a classic bread and butter cucumber pickle. Here is my recipe, using a hot water bath to sterilize the jars and can the pickles (the Ball jar canning website has a helpful primer). This recipe can easily be doubled. 

Spicy Bread and Butter Pickles
Makes about 4 pints

2 pounds Kirby (pickling) cucumbers, washed
2 T. kosher salt
2 c. apple cider vinegar
1 c. distilled white vinegar
2 1/4 c. sugar
2 T. whole mustard seeds
2 t. celery seeds
1 t. black peppercorns
1/2 t. tumeric
1 bay leaf, crushed
4 whole cloves
1 t. red pepper flakes

Start a large pot of water on high heat. Place 4 glass 1-pint jars and their bands in the pot on a canning or pasta insert. Bring pot to a boil, then turn off and let the jars and rings sit. In a bowl of hot (not boiling) soapy water, wash new lids.

Slice cucumbers thin, about 1/8 to 1/16 inch thick (get out that mandolin gathering dust in your cabinet). Toss cucumbers with salt in a large colander and let drain in the sink, tossing occasionally. After 30 minutes, squeeze out as much water as you can. Do not rinse. 

Bring vinegar, sugar, mustard seeds, celery seeds, peppercorns, tumeric, bay leaf and cloves to a boil. Turn off heat. 

Remove the glass jars and bands from the warm water and place on a clean towel nearby. Divide cucumbers evenly into jars, and add 1/4 t. of red pepper flakes to each jar. Rinse the soapy water off the lids and place them on the clean towel. Bring the large pot of water back to the boil.

Divide pickling liquid evenly between the four jars, leaving a 1/2 inch of space at the top. Wipe the rims and put lids and rings onto the jars. Tighten rings. Place capped jars back into the boiling water, making sure they are fully submerged in one inch of water. Boil for 10 minutes. Remove from the water and place on a clean towel. You will start to hear the lids form the vacuum seal. Allow jars to sit undisturbed several hours, until cool.

Pickles will keep in the pantry for one year.

----------------------

I've done dill spears and sweet turnips as well, but my latest revelation is pickled fennel. I was inspired by a recipe in Bon Appetit, but I simplified it a great deal. The pickling process simultaneously tones down the anise flavor of the fennel and creates a whole new taste. I've been using them on salads and in sandwiches. This is such a small batch, I didn't bother canning it. I just keep them in the fridge.

Pickled Fennel
Makes about 2 cups

2 fennel bulbs, washed, cored, and sliced thin
zest of 1/2 lemon, peeled using a vegetable peeler
3/4 c. unsweetened rice vinegar
3/4 c. water
1/2 c. sugar
1 T. kosher salt
2 t. coriander seeds

Place fennel slices and lemon peel in a 1-quart jar.

Place vinegar, water, sugar, salt and coriander seeds in a saucepan and bring to a boil. Stir quickly to dissolve sugar, then pour over fennel in the jar. Close with a lid, and allow to cool. Refrigerate.

Will keep in the refrigerator 3 weeks. 

Friday, July 26, 2013

An appreciation of Southern cooking

I've just returned from a food- and scenery-rich family reunion in South Carolina. I was fortunate to spend a week on a lovely beach in the low country, with big sky, dolphins, and a much warmer Atlantic Ocean. One of the best aspects of the trip was, of course, constant access to Southern food.

Southern food may represent everything that is wrong with American cooking to some people. To be sure, pork and mayonnaise (Duke's only, thank you very much) are in heavy rotation. Portions are big. I may or may not have had pimento cheese at every meal. But fresh ingredients abound. We ate delicious and local shrimp, peaches, corn, tomatoes, and peanuts. Legumes and greens play a prominent role in many dishes. And cooking from scratch is still revered. 

One night some of the relatives took on dinner for our large crowd, and turned out some beautiful ceviche and gazpacho. Dinner was delicious, but the crowning glory of that meal was dessert: they secretly concocted up a banana pudding from Miss Edna Lewis, a famed southern chef. Banana pudding, with its roots in the English trifle, is quintessentially Southern. And even if dessert that night did fall on the indulgent end of the spectrum (24 eggs anyone?), it was scrumptious.

Uncle Frank's and cousin Laura's creation

When I got home, I set out to make a slightly healthier version of this classic. And while I love food cooked from scratch, there is a time and place to incorporate pre-made items. Such is the case here with the Nilla wafer. You can use other kinds of cake or cookies in this dessert, but the Nilla just feels right. That being said, the recipe for banana pudding on the side of the Nilla box was depressing--it relied on boxed pudding and store-bought whipped topping. If you make it as instructed by Nabisco, the only whole food ingredient is the banana.

The irony of so many "convenience" foods is that they don't really replace something that is particularly inconvenient to make. Homemade pudding takes 6 ingredients and about 10 minutes to make. Homemade meringue takes 3 ingredients and again, about 10 minutes to make. In fact, a recipe like this that uses pudding and meringue is quite convenient, since you use the egg yolks in the pudding and whites in the meringue. Start to finish, this recipe took about 30 minutes to complete. Pretty convenient to me. So while I embrace the Nilla wafer itself, don't follow the recipe on the box. Use this one instead.

My version. 

Southern Inspired Banana Pudding

Makes 6-8 servings.

For the pudding:
1/2 c. sugar
1/3 c. cornstarch
1 t. salt
2 c. whole milk
4 large egg yolks
2 t. vanilla extract

For layering:
Nilla wafer cookies
3-4 ripe bananas

For the meringue topping:
4 large egg whites
1/4 t. cream of tartar
6 T. sugar

To ensure this recipe goes quickly, be sure all ingredients and equipment are at the ready:

  • Separate the egg whites and egg yolks. Place egg whites in a large bowl of a stand mixer, and place in the fridge.
  • Place yolks and vanilla near the stove. Place a thermometer and fine mesh strainer on a bowl near the stove.
  • Preheat the oven to 425 degrees F.
  • Measure out cream of tartar and 6 T. of sugar and place near the stand mixer.
  • Place 6-8 wide mouth 1 cup mason jars on a baking sheet (you can also use an oven proof 8x8 glass dish). Place 4 wafer cookies in the bottom of each jar. Keep the bananas and a knife nearby.

Now you can start cooking.

For the pudding, place 1/2 c. sugar, cornstarch, and salt in a saucepan. Add a small amount of the milk and whisk to make a paste. Add the rest of the milk, whisk together, and turn on the heat. Heat the mixture, whisking, until it starts to boil. Once it reaches a boil, lower to a simmer and cook for one minute until it thickens.

Turn off the heat, and scoop out about 1/4 c. of the mixture into the egg yolks. Mix together, and return to the pan. Cook on medium heat until the pudding reaches 160 degrees, about 1-2 minutes, then take off the heat and strain into the bowl. Add vanilla and stir.

Cut about 5-6 pieces of banana into each jar on top of cookies. Ladle about 1/4-1/3 cup of pudding into each jar.

In the bowl of the electric stand mixer fitted with a whisk attachment, beat together the egg whites for about one minute, then add cream of tartar. Beat on high, and once the foam is established, gradually add the sugar one tablespoon at a time. Continue beating until the whites are glossy and have structure.

Spoon meringue evenly into each jar (it's okay if it overflows a bit). Make sure the pudding is completely covered. Place baking sheet with puddings on it in the oven and bake for 4 minutes, until meringues are browned. Allow jars to cool for 15 minutes, then refrigerate for 2 hours.

Friday, July 12, 2013

Are You Overwhelmed by Summer Vegetables Yet?

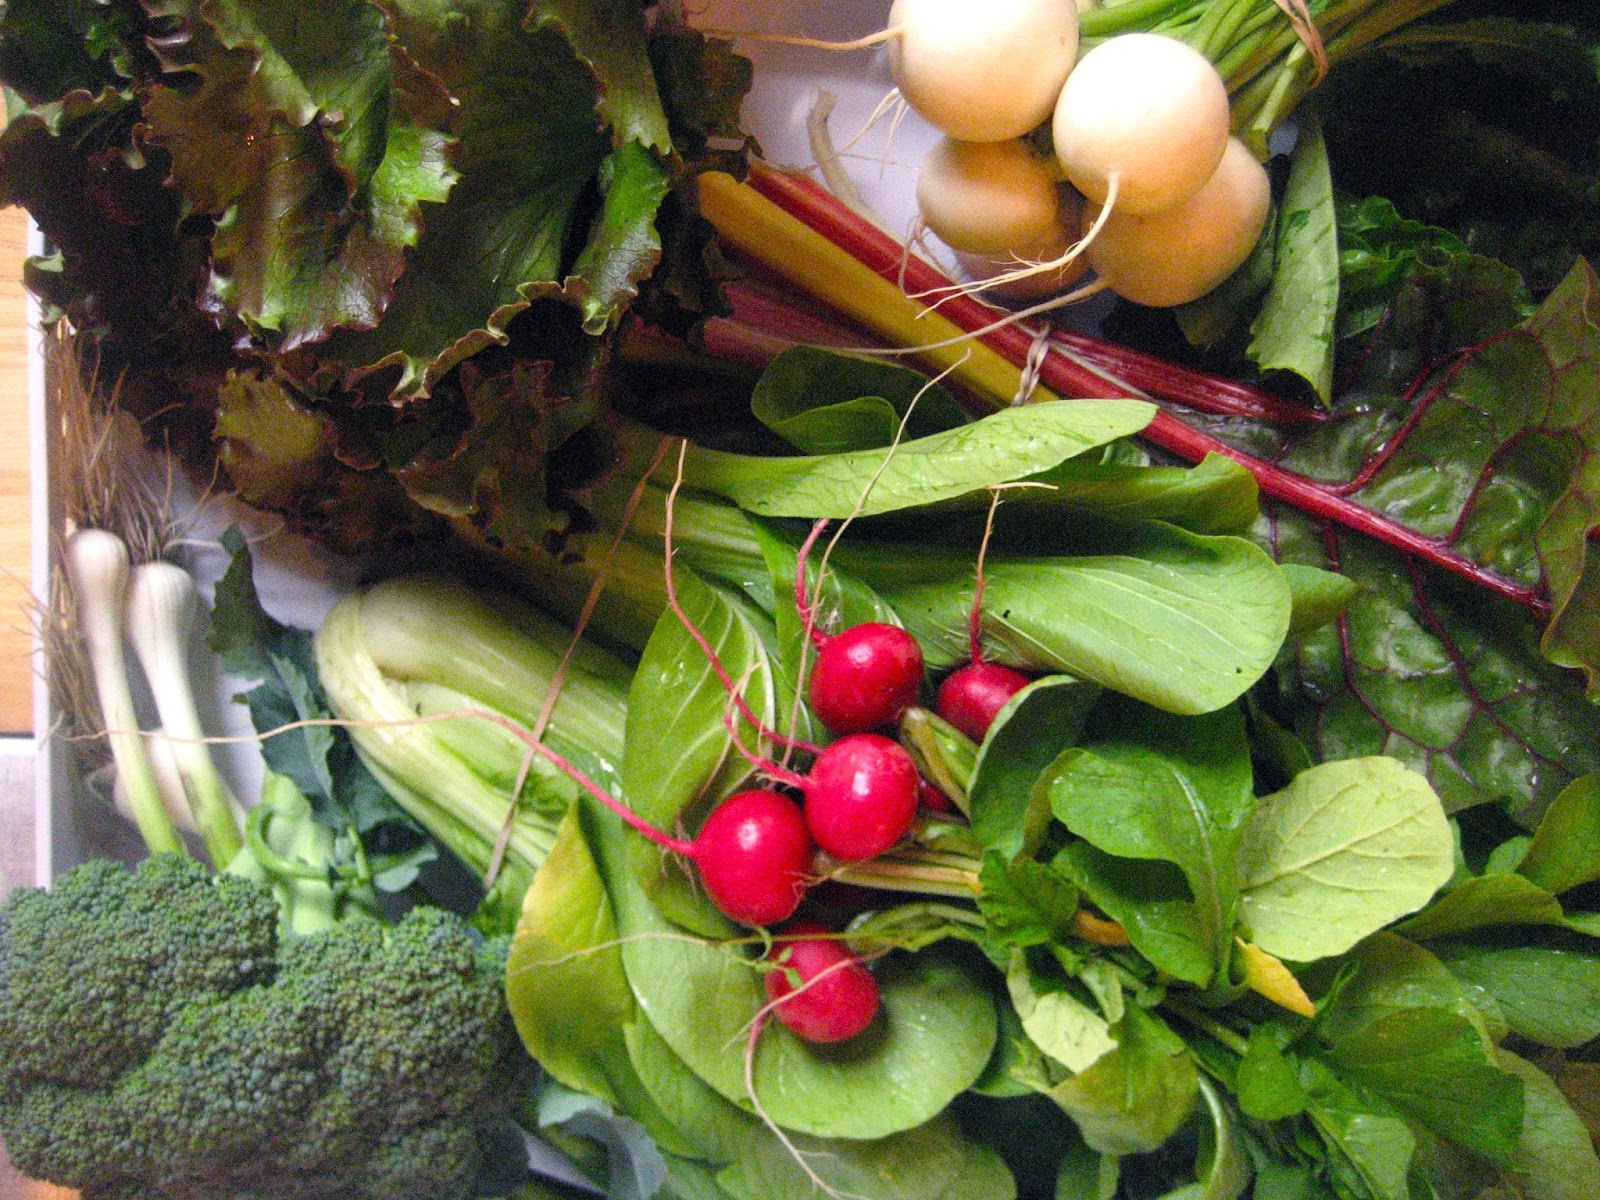
My CSA started a few weeks ago. I definitely frequent the many farmers' markets in my area, but a CSA farm (Community Supported Agriculture) is something special. Essentially, you become a shareholder in a farm, pre-purchasing in the winter whatever the harvest has to offer the following summer. My CSA provides a robust mix of organic fruit, vegetables, herbs, and flowers, starting in mid-June and continuing through mid-October. If I play my cards right, I have CSA produce in my freezer long past the last pick up. Some CSAs deliver, but we go to our farm to pick up. Even though that's sometimes a chore, I like the experience of seeing where my produce is grown.  


I'm going to admit, some weeks the amount of produce overwhelms even me. I've been participating in a CSA for thirteen years now, so I've had a lot of time to develop strategies for dealing with the weeks when I find myself staring blankly at, say, four or five overflowing grocery bags. I am sharing my ten best pieces of advice with you: 

1) Prioritize. If it's perishable, eat it first. Lettuces, herbs, and berries go down the hatch as soon as possible. But there's a limit to how many salads one family can eat.

2) Keep it simple! I've done the stuffed tomatoes, gratins, and cabbage rolls, but on the heavy harvest weeks you may start feeling resentful towards your food if you get too ambitious. 

3) Freeze where you can. Some items, like corn kernels or tomatoes, can go right in raw.  Many others need a fast blanch, but I queue them up and do them all sequentially in the same water. The freezer is your best friend on the high volume weeks. 

4) Items like cabbage, zucchini, hearty greens, carrots, green beans, onions, garlic, roots, and radishes will all last for a while in the fridge. Later in the week, I use these to make a slaw

5) Or a fritter

6) Or a sauté. A few days ago I sliced and softened four shallots in my cast iron skillet, threw in a cup of shelled peas, and gave them a three minute trip in the hot pan. I then added salt, pepper, a squirt of lemon, and chopped mint from the garden. Heavenly. This would work for green beans, snap peas, or zucchini. 


7) Hearty greens like chard always benefit from being cooked in a little bacon fat and garlic.

8) Roots and cauliflower are fantastic roasted. Of course, this is also the time of year when I often don't want my oven blasting away at 400 degrees. So when the grill is going, I toss these in a little olive oil, salt, and pepper, wrap them in two layers of aluminum foil, and nestle the packet directly into the coals.


9) Tomatoes are a special beast. I try to eat as many as possible right away. Mostly in a simple caprese salad with mozzarella and basil. Or in a bread salad (more on that in future post). But there is at least one week a season when I am faced with somewhere north of 15 pounds. Then I spend the time slicing the tomatoes, crank on the oven, and roast them. Then I freeze them. Which then in turn makes the best marinara and soup ever come January. 

10) When in doubt, I make soup. I take anything that may be languishing in the fridge, like carrots, beets, or squash, and cook them with some broth and onion until soft. Then I puree the soup and stick it in the freezer. The soup I made this week included a large haul of summer squash, plus some potatoes. When I use it, I plan to add some milk and herbs.


Once I learned to embrace the glut, I found that I could reduce the amount of withering greens in the fridge and truly appreciate the brief growing season. 

Monday, July 8, 2013

Liebster Award

I've been nominated for a Liebster Award. What is this award, you say? I must admit, I didn't know anything about it until recently, and it's still a bit of a mystery how it all began. It's essentially an award by bloggers for bloggers, sort of a virtual chain letter. I love that it's based on peer-to-peer recognition, and it's a way to help introduce great blogs to a larger audience. To accept the award, there are a few rules I have to follow:

  • Pass the award on to 11 bloggers (and let them know)
  • Pose 11 questions to these chosen bloggers
  • Answer 11 questions posed by my nominator (and let her know)
  • Post 11 random facts about me.


So I send my heartfelt thanks to Christina at Greek Cooking for nominating my blog, and I will now return the favor. I am looking forward to following these 11 fantastic up-and-coming blogs:


My 11 questions for these bloggers are:

  • Why do you blog?
  • What is your favorite vegetable?
  • What is your favorite utensil in the kitchen?
  • What's your closest grocery store? 
  • What were the last three things you cooked?
  • Are you a baker or more of a savory cook? 
  • Chocolate desserts vs. fruit desserts: discuss. 
  • What is your favorite place to visit? 
  • If money were no object, what restaurant would you most like to try?
  • Best food movie?
  • Last meal: what would it be?

Here are my answers to the 11 questions that Christina posed to me. Some of these were challenging, but I hope I did my best:

  • Where were you born and where do you live today? I was born in New York City and I live in Massachusetts.
  • What is your favorite cuisine? This week it's Indian and Mexican, but next week I am sure it will be different.
  • Do you believe in zodiac signs? What is yours? I am a Cancer but I don't much believe in signs.
  • What is the urge that makes you cook something in the first place? I usually have two sources of inspiration: seeing a great ingredient at the market, or reading a great recipe.
  • Do you dare try something different than your culinary spectrum? I do try to push my limits, but the joy of cooking is that there are still endless possibilities within whatever limits you set in terms of ingredients or cultures.
  • How many hours per week do you spend blogging? At the moment, it's around five or ten hours a week, depending on my teaching schedule (I teach cooking for kids and adults).
  • Do you believe we actually shouldn’t be eating any meat at all? I don't think we should all give up meat, but I do think we should be eating fewer meat-centric meals. That way we can all afford to support the meat producers who provide better tasting meat, who treat animals humanely and who think about how animal farming impacts our environment.
  • Are restaurants your favorite place to meet with friends? I love eating out, but I love eating at friends' houses more (except that now some friends seem to have the need to apologize when they cook for me, since I've been to cooking school and all).
  • What is your hobby (except cooking)? Driving my kids around. No time for anything else.
  • Who is your favorite actor or actress and in which film? Another hard one. I'll go with Meryl Streep, but only because she's played Julia Child.
  • Do you believe that we eat to live or that we live to eat? Yes!

And finally, here are 11 random facts about me:

  • I don't like snails.
  • But I've eaten sea slugs in China.
  • One of my greatest food experiences was a 13 course meal on New Year's Eve in Venice. 
  • I live next to a river.
  • I never stop being proud of my mother for being in the first class that included women at the Culinary Institute of America.
  • I have a weakness for musical theater.
  • My first concert was Men at Work.
  • I've never seen the Godfather, Jaws or Rocky. 
  • I was a practicing attorney for 12 years before I went to cooking school.
  • I have the worst oven of anyone I know.
  • I love to write.

So that was fun! Good luck to all the bloggers I nominated. I hope you accept the award, and pass it on. 

Wednesday, July 3, 2013

Strawberries and Camp and Kids

I've been out of the blogging world for about a week now. Last week I taught a cooking camp with Kids Cooking Green, and frankly, I felt like the rest of my life was on hold. It was intense and time-consuming, but also incredibly rewarding. The format of the camp was simple: the students cooked their own lunch every day. But lunch meant a multi-course meal from scratch, often with a homemade drink or dessert. Thirteen kids aged 9-12 came every day ready to learn and taste, which made hauling the boxes of equipment and ingredients worth it.

The camp coincided with strawberry season here in the northeast, which is short but oh so sweet (I can happily report that my own family picked almost 20 pounds this weekend to stash in the freezer for winter jam making). At camp, we made sure several recipes featured local strawberries, which taste so different from the big berries that get trucked in from far away. When I work with kids, I like using a popular food like berries as a gateway to introduce topics like how to buy seasonally and locally, and how food tastes better and is better for you when it's cooked from scratch.


By far the best strawberry recipe of the week was something I called Pink Bruschetta. We made a quick berry sauce, toasted a quality baguette, and then topped the toasts with mascarpone cheese and the sauce. It was fun to make, and even though we cooked the berries, the sauce still tastes like eating a berry just picked from the field.

So get out there and grab some local strawberries before they are gone. And then make this dish. Because if a 9 year old can do it, you can too. 


Pink Bruschetta

3 c. strawberries, washed, hulled, and cut in half
2 t. lemon juice
1 t. lemon zest
6 T. brown sugar
1 c. mascarpone cheese
One baguette, cut into 1/2 inch pieces and toasted

In a saucepan, combine the strawberries, lemon, lemon zest and sugar. Cook on medium heat until the strawberries are soft, about 10 minutes. Using a potato masher, break up some of the strawberries in the sauce. Set aside. (Strawberry sauce will keep in the refrigerator, for one week.)

In a small bowl, whisk together mascarpone with 3 tablespoons of the strawberry sauce, enough to turn the cheese a pink color.

Spread cheese mixture on a piece of toasted baguette. Top with strawberry sauce.

Wednesday, June 19, 2013

The Newest Addition to the Kitchen Family

Some people get pets; I collect kitchen equipment. My family ridicules me. My cabinets look like they have been taken over by a permanent Jenga installation, and really, there is no more room for anything else. Yet I was powerless to resist a recent sale and brought yet another appliance into the house. This time, it was an ice cream maker that called my name.

And oh, was worth it. I and my new best friend, the Cuisinart "Pure Indulgence," have been turning out killer ice creams on an alarmingly regular basis. I don't care that the machine is currently stored on the dining room table. Homemade ice cream is the bomb, and it's better than anything you can get commercially. Hands down.

My first flavor was straight up chocolate (because otherwise there would have been mutiny in my house). For a recipe, I went to the source for all things dessert, David Lebovitz, and used his chocolate ice cream recipe. I followed it as written, except I added milk chocolate chunks for the last few minutes of churning. Heaven. Next up, buttermilk ice cream, this time to pair with a blueberry cobbler recipe I was creating for a class. Not wanting to let the machine rest a day, I decided to be a tester for a Food52 Community Pick contest for frozen desserts, and made Cucumber Mint Ice Cream. And most recently, I started experimenting with the flavor that no one doesn't like--salted caramel.

I have found myself thinking about one of my favorite childhood treats, the hot fudge malt from The Malt Shop in Minneapolis. I felt compelled to try to replicate its taste from a thousand miles away. Malt powder is both a sweetener and a thickener, derived from barley, and it's common in the midwest. No one drinks frappes or shakes, you drink malts. Malt powder wasn't easy to find here (I found it, of all places, at Target). But it's worth seeking out, and I have discovered King Arthur Flour carries it as well.

The major difference between the midwestern version and my ice cream is I dialed down the sugar, to try to enhance the chocolate and malt tastes. The result is delish. So if you have an ice cream maker gathering dust somewhere (a wedding present perhaps?), get it out and start churning.

Hot Fudge Malt Ice Cream 

For the base: 
1 c. whole milk
2 c. half and half
1 c. malt powder
4 egg yolks*
1/2 c. sugar
1 t. vanilla
1/2 t. salt

For the hot fudge sauce:
1/2 c. unsweetened cocoa powder
3/4 c. sugar
1 c. cream
2 T. milk

Base directions: Place the milk, half and half, and malt powder in a saucepan. Place the egg yolks and sugar in a small bowl, and whisk until combined. Place a mesh strainer over a container that can go into the refrigerator, and place the vanilla and salt into the container.

Heat the milk mixture in the saucepan on medium heat until bubbles start to form around the edge of the pan. Do not boil. Take about 1/2 cup of the milk mixture and mix it into the egg yolk mixture, then pour the yolk mixture into the saucepan. Cook, stirring with a wooden spoon, until the mixture thickens enough to coat the back of the spoon without dripping (about 5 minutes).

Pour mixture through the strainer into the container. Stir to combine the vanilla and salt, and allow to cool slightly. Cover and refrigerate until cooled completely, preferably 24 hours.

Sauce directions: In another saucepan, place the cocoa and sugar. Add cream and milk and whisk until combined. Heat on medium heat, stirring, until the sugar melts and the sauce turns glossy. Cook until the sauce does not taste grainy. Allow to cool slightly, then transfer to a container, cover, and refrigerate until cooled completely, preferably 24 hours.

To make the ice cream: Freeze base according to your ice cream maker's instructions. Two minutes before the ice cream is done, mix 1 cup of hot fudge sauce into the ice cream to blend. Reserve the remaining sauce to drizzle on top. Freeze ice cream for 2 or more hours.

Serve ice cream with hot fudge sauce, and, if you are like me, a sprinkle of malt powder on top.
__

*One by-product of making lots of ice cream is the proliferation of egg whites in the fridge. You could make meringues or angel food cake, but my kids have discovered the joy of the egg white sandwich. And presto, the egg whites are gone. Which means I need to make more ice cream.

Friday, June 14, 2013

In Praise of Pizza

Before the weather gets too hot to turn on the oven, do yourself a favor and make pizza. I live in a town that is teeming with run-of-the-mill pizza joints. Yet we somehow still are compelled to serve this so-so pizza at every kid's birthday party, school event, and team function. When I can, I buck the trend and make it at home, and then I always wonder why I ever bother to eat the usual fare. 

Pizza dough has only a few ingredients, and can be made ahead. Putting the pies together isn't much work either. I don't use a pizza stone. I don't bother with tossing my pie in the air or even a rolling pin. I simply use my hands to shape the dough directly onto the Silpat or parchment paper that it will be baked on. And while choosing toppings can be both participatory and creative, I'm going to admit that the one downside to make-your-own-pizza night is that your kitchen may resemble a war zone afterwards. But for my kids, the pride of ownership that comes with the act of making their own creation is pure gold. 

In terms of what goes on top, the sky is the limit. Sometimes I am haphazard, and pull out any leftover bits of meat, cheese, sauce and veggies and throw them on the dough. If you want to be more purposeful, there are some killer combinations out there. More than once, I've attempted to recreate a pie I've had at Za, my vote for the best pizzeria in my neck of the woods. I'm still trying to perfect a copy of their chorizo, mustard, and dill pickle creation. I've used butternut squash, fontina and arugula; strawberry, pesto, and mozzarella; or my latest creation below, onion confit, gruyere, apple and smoked turkey.


My dough recipe feeds four, with some leftover to make dough knots sprinkled with parmesan. I use a stand mixer, but you can make it all by hand if you want to work your arms. I've given instructions for the oven, but another great option is to grill your pizza (that solves the hot oven problem in the summer). This lesson from The Kitchn is a great resource to get started. 

Pizza Dough
makes about 2 pounds of dough

1 1/2 c. lukewarm water
3 t. yeast
pinch of sugar
2 c. white flour
2 c. white whole wheat flour, or whole wheat flour
1 T. salt
3 T. olive oil

In the bowl of a stand mixer, place yeast, water, and sugar. Let stand about 5 minutes, or until the water starts to bubble and you can smell the activated yeast.

Place the white flour, white whole wheat flour, and salt in a small bowl. Have some extra flour nearby for kneading.

Add olive oil and 2 cups of the flour mixture to the bowl. Using the paddle, stir on medium speed until mixed. The dough should still be shaggy at this point. Switch to the dough hook, add another 1 1/2 cups of flour, and mix again until the dough should start to come together. If it's still sticking to the sides of the bowl, add more flour, 1/4 cup at a time, until the dough pulls away from the sides. Continue to mix, using the dough hook, on high speed, about five minutes. Stay near the machine, as it tends to jump around when it's working this hard! 

Turn the dough onto a clean work surface. Knead by hand for about a minute, adding additional flour if needed so it isn't sticky. Stop kneading when the dough is smooth and elastic, and springs back when you poke it with your finger.

Line the mixer bowl with a small amount of olive oil, and place the dough ball in it. Spread a small amount of oil on top. Cover with a towel and let rest in a warm place until doubled in volume, usually about an hour.

(You can make the dough the night before you need it, and place it in the fridge overnight. It will still need to finish the rise in a warm room, so take it out of the fridge as soon as you get home, and let it rise while you get everything else together.  I often put the dough on top of or near my stove while it's preheating to cook the pizzas.)

Preheat the oven to 450 degrees F. In the bowl, punch the dough down and turn onto a clean surface. Divide into 4 to 8 pieces with a bench scraper. Place a silicon sheet or parchment on a baking sheet, and place a piece of dough on top. Using your fingers, start pushing the dough from the middle until it is your desired thickness. Brush the top with oil and top with your toppings.

Bake until crust is browned, about 10-12 minutes.  

Thursday, June 6, 2013

Wrapping Up a Great Summer Meal

As the weather turns warmer, I am noticing more locally grown produce arriving at the grocery stores, and my long-awaited CSA share is starting next week (we are members at the dynamite Lindentree Farm). June is a perfect time to start pulling out my favorite veggie-heavy, warm weather dishes.

I love all sorts of Asian flavors and cuisines. One concept I think is genius is using a lettuce leaf as the vehicle to wrap up your food. I first encountered the idea when eating Korean bugogi and French-Cambodian rouleaux. When it's hot out, using lettuce or cabbage as a wrap is especially refreshing.

I created these hoisin beef wraps on a day when I didn't want to use the oven and I didn't want to eat anything too heavy. The wrap combines a highly flavored meat with all sorts of crunchy accompaniments. I relied on a few pantry staples like hoisin and ramen noodles, but sometimes that's how I roll, especially when I'm trying to cook dinner in a hurry. A special plug for hoisin--it's a bit of a magic sauce, something like a sweet Worcestershire, and it's always on the fridge door in my arsenal of secret weapons that can create robust flavor quickly.

This recipe seems like it has a lot of moving parts, but in fact you can get this on the table in about a half hour. Start with draining the cucumbers and washing the lettuce, and end with the croutons and meat. And I guarantee once you make crunchy ramen croutons and quick pickles, you will start looking for ways to incorporate those in to other meals as well.


Hoisin Beef Wraps with Crunchy Ramen Croutons and Quick Pickles
meat adapted from Food Network; pickles adapted from How to Cook Everything

Serves 3-4. 

For the wrap: 
1 head butter (Boston) lettuce, leaves separated

In a large bowl or sink, soak lettuce leaves for 10 minutes in cold water to remove dirt. Dry leaves, but leave them whole.
___

For the pickles: 
1 pound cucumbers
1 T. salt
1 t. sugar
1 t. sesame oil
1 t. reduced sodium soy sauce
1 t. rice vinegar

Slice cucumbers as thinly as possible (if you have a mandolin you should use it). Place cucumbers in a colander and toss with the salt. Let sit for 30 minutes in the sink, squeezing them occasionally with paper towels.   

Toss with sugar, sesame oil, soy sauce and rice vinegar. 
___

For the meat: 
1 pound ground beef or turkey
1 T. grated fresh ginger
2 scallions, chopped fine
1 clove garlic, minced
2 T. reduced sodium soy sauce
1/4 c. hoisin sauce

In a skillet, cook meat over medium high heat until browned. Drain off any excess fat. Stir in ginger, scallions, garlic, soy sauce, and hoisin and cook for one minute. Remove from heat.
___

For the croutons:
2 packages ramen soup, flavor packets discarded
3 T. canola oil
2 T. sugar

Remove dried ramen noodles from the packaging, and gently break the noodles into small pieces, roughly 1/2 to 1 inch. In a skillet, heat oil and sugar. Add noodle pieces and cook, stirring constantly, until noodles turn golden, about 5 minutes. Cool on a buttered plate.
___

To eat this delectable dish, take a lettuce leaf in your hand, spoon in a small amount of meat, and top with a few pickles and croutons. Eat as delicately as possible, but I warn you it's hard not to stuff the whole wrap into your mouth in one bite. Repeat as many times as needed.

Thursday, May 30, 2013

No Green Thumb

Here is a confession: I may be a great cook, but I am a terrible gardener. You'd think the two would go hand in hand, but they don't. I've done in a lot of plants over the years, both indoors and out. In addition to my lack of natural ability, I'm also cursed with a shady backyard and bad soil.

The only plants that thrive in my garden survive in spite of me. Mint is basically a weed, and it shows up every spring, keeping us supplied for minty water, mojitos and iced tea all summer long. An oregano plant that was gifted to me resurfaces every year after I stuck it in the ground. In fact, it appears to be more healthy than ever, and this year I've already cut a huge amount of oregano to dry.

In an optimistic mood last summer, I bought a rosemary plant, and I managed to remember to water it occasionally. In the fall, I brought it inside and it survived the winter. This experiment has emboldened me to experiment further with planting herbs in containers. Recently I hauled out all of the pots I could find in the garage (from previous failed attempts to grow something green), and purchased seedlings of some of my most used herbs.


For about $70, I walked out of the garden store with 13 plants: three basils, three chives, two cilantros, two parsleys, lemon verbena, lavender, and thyme. And the soil to stick them in. And a bit of organic food. The plants were in the pots and watered in under an hour, and I am happy to say so far they are thriving.


I've already found myself out there snipping a few leaves for almost every meal--a chiffonade of basil to finish a pasta dish, chives for a soup, and parsley for a pâté. If I can manage to make these plants last, I will make back my money in no time. 

Herbs are integral to all of my cooking, but there are a few dishes that make them shine. I've written about my favorite chimichurri sauce, and I'm waiting patiently for a bumper crop of basil to make and freeze pesto. Another herb based favorite in this house is compound butter, which is a mixture of softened butter, herbs, and seasoning. Compound butter is a finisher, meaning you add it to your dish just before serving, ideally when the item getting the butter is still warm.

Compound butter isn't complicated to make, but don't let its simplicity fool you. It can be a game changer when it comes to mealtime, and once you start using it, it's hard to stop. In my house, we've been known to put it on every single component of a meal. Steak, fish, any cooked vegetables, and grilled bread are just some of the many foods that benefit from herbed butter. And with my new garden at hand, I expect to be eating a lot more compound butter this summer.


Compound Butter

4 oz. butter, softened
2 T. chopped herbs
salt and pepper to taste

Mix ingredients together. Do not refrigerate before using.


Wednesday, May 22, 2013

"I'm Hungry...."

Are snacks the bane of your existence? If you have a child aged 2-18, the answer may be yes. Snacks to bring to school, snacks after school, snacks on the way to an activity, snacks when their friends are over, snacks before bed. Some days it feels like all occasions demand a little morsel to eat.

These small meals often need to be quick and portable, and must be "not boring." And, as if those criteria weren't enough of a challenge, you might also want them to to be healthy. I think any snack that's a fruit, veggie, or whole grain should be in the plus column, so I do make the effort to keep the pantry stocked with some quick options: applesauce packs, yogurt, dried fruit, sunflower seeds, fruit leather, crackers and cheese. Grapes, apples, and bananas are fairly portable. If I'm on top of things, I've got cut carrots, celery or cucumbers ready to go, frozen fruit that can be smoothie-fied, and granola for a parfait.

But then there are the hall of fame snacks. These are the ones that are healthy, quick, cheap, homemade, and no one seems to tire of them (at least not yet). If I have ingredients for these three snacks on hand, I know I am home free when faced with the inevitable requests for "just a little something to eat."

Popcorn
It's taken me a while to find out what many foodies already knew: you can make your own microwave popcorn. Using an old school brown paper lunch bag, you can create the most airy and delicious popcorn in the microwave in minutes. There's really no recipe. Just place a quarter cup of popcorn kernels in the bag, fold the top a few times, and microwave until done, about two minutes (time will vary depending on your microwave). Then remove the bag, keep it shut, and melt a 1/2 T. of butter or olive oil in the microwave in a separate bowl. Pour over the popcorn, sprinkle in a little bit of kosher salt or grated parmesan cheese and shake. 


Salsa Fresca
Putting out a bowl of salsa with chips on the table often redirects the inevitable "can I have a snack?" request before it's even asked. Salsa is one of those foods (like salad dressing or marinara sauce) that is best made from scratch, not only in terms of taste but cost. Obviously making fresh salsa using summer tomatoes is best, but there are seem to be more hydroponic options in the stores year round that aren't bad.


3-4 tomatoes, chopped
3 scallions, chopped fine
1/4-1/2 c. cilantro, chopped fine
Juice of one lime
Salt and pepper to taste

Mix all ingredients in a bowl. Taste and adjust seasonings. Best eaten within a few hours.


Beloved Crunchy Kale 
Crunchy kale is an apparently magical concoction, compelling even the most suspicious eater to succumb to its power. My son calls it his "beloved" kale. At a class I taught recently, a mother watched in utter disbelief as her son stuffed handful after handful of kale chips into his mouth, leaving little green bits stuck to his hands, shirt and teeth. But as he was eating his veggies with relish, we forgave him his manners. 

1 bunch lacinato kale
3 T. canola oil
1 T. apple cider vinegar
Kosher salt to taste

Preheat the oven to 300 degrees F. 

Destem the kale pieces by taking the bottom of the stem in one hand and, starting at the bottom of the leaf, slide the other hand along the leaf to remove both sides of the leaf. If the top of the leaf is still connected, separate them. 

Place parchment on two baking sheets and lay the leaves side by side. They can be close but not touching. Pour oil and vinegar into a bowl. Using a pastry brush, lightly paint both sides of each leaf with the oil/vinegar. Sprinkle with salt.

Bake for 16-20 minutes, until crispy, rotating pans if needed to ensure even cooking. Taste and sprinkle on additional salt if needed while still warm. Crunchy kale will keep in an air tight container for 2-3 days. You can recrisp the kale in a 250 degree oven or a toaster if needed. 


Wednesday, May 15, 2013

Cooking really does matter

When I was in cooking school, I had the good fortune of volunteering to assist a class through Cooking Matters, which is a program of the national anti-hunger organization Share Our Strength. Cooking Matters teaches cooking to low-income families, relying on an amazing (and amazingly small) group of paid staff along with volunteer chefs and nutritionists. I am about to complete my fifth tour with Cooking Matters as a chef instructor, and I've taught adults and kids in schools, Head Start programs, and health centers.

Cooking Matters classes have the twin goals of encouraging participants to cook more at home and make healthier eating choices. Each class has a hands-on cooking approach combined with nutrition information, and with adults we meet one week at a grocery store to learn about smarter food shopping. 

It doesn't seem possible, but you can be hungry and obese in our country, thanks to our twisted food system that offers up a dizzying array of fattening food on the cheap. If you only have a dollar to spend on lunch, where else can you best feel full than off the McDonald's dollar menu? Cooking Matters smartly recognizes that hunger and health can be tackled together with home cooking. Every class recipe costs no more than $1.40 per serving and increases exposure to whole grains, more veggies, and lean meats.

Cooking from scratch at home is practically a political act, and is certainly is a dying art. Food writer Michael Pollan's new book Cooked posits that the best thing we can do for your health and the health of the planet is to get back to cooking at home. But home cooking does more, by addressing hunger as well.

Hunger is an all too common problem in this country, and plenty of people with homes and jobs don't know where their next meal is coming from. A new documentary, called A Place At The Table, explores the shocking facts about hunger in our country. What's even more shocking is that, given the fact that there are millions of hungry children in America, some lawmakers are proposing to cut food stamps this year, despite the power of the program to ameliorate childhood hunger and poverty.

Every time I teach for Cooking Matters, I am blown away by the participants' enthusiasm for cooking, even when they must feed their families on an incredibly tight budget. One of my favorite items to teach in Cooking Matters class is a frittata. It's delicious, inexpensive, and a great way to use leftover ingredients. It can even be made ahead--in class, we often cook individual frittatas in muffin tins to show that they can be reheated in seconds for a fast breakfast. If there's even a small amount of smoked meat, skeptical kids suddenly seem interested. My most recent frittata at home included spinach, onion, smoked turkey and cheddar, all items threatening to go bad in the fridge. Yum.


Anytime Frittata

Serves 4.

8 eggs
2 T. light cream or milk

1/2 t. salt, or to taste
1 grind of black pepper, or to taste
2-3 T. olive oil

2 c. chopped veggies (red pepper, corn, spinach, broccoli, zucchini, mushroom, onion, scallions)
1/4 c. diced ham, turkey, turkey bacon, or bacon
1/2 c. shredded sharp cheese (cheddar, fontina, feta)

In a bowl, beat together eggs, cream, salt and pepper. Set aside.

In a large oven proof skillet, heat 1 T. oil on medium high heat. Add raw veggies and cook until softened, about 5 minutes. Remove from pan.

Add another 1-2 T. oil to the pan and heat on medium high heat. Swirl around the pan to coat the sides. Add egg mixture to the pan. Sprinkle meat, vegetables, and cheese around the eggs. Cook on the stove top until bottom is set but top is still runny, about 5 minutes.

Heat broiler. Remove pan from the stovetop and place under the broiler. Cook frittata until eggs are set and top is slightly browned, about 5-7 minutes.

Thursday, April 25, 2013

Endless Possibilities for Chicken

Chicken chicken chicken. With almost 40 billion pounds of chicken produced in the US as of a few years ago, you could almost say Americans eat their weight in chicken annually. Good thing there are so many different ways to cook a delicious chicken dish.

I'm a big advocate for buying whole chickens. There are many reasons to be troubled by the American chicken industry, from plant conditions to the pollution caused by chicken farming to the chemicals used in raising chickens. Buying a humanely-raised, organically-fed chicken is the simplest way to avoid these problems. And while organic meat gets a bad rap for being expensive, that's not always the case. I recently paid $14 for a 3 and 1/2 pound organic chicken, but that $14 goes pretty far when you account for the fact that I get two to three meals out of one chicken. A huge cost when buying meat is the butchering. A whole chicken may run $1.99 a pound, where boneless skinless breasts run $6.99 a pound. There's no need to pay for someone else to cut up your chicken for you. So my best advice is to buy a whole bird and learn how to cut it into useable pieces. This how-to video is a great primer.


Or forget cutting up the chicken first and just roast it whole. High heat and dry conditions make for crispy skin and juicy meat. I may be late to the party, but I am a recent convert to the roasting method called spatchcocking. OK, it sounds a little naughty, but it's simply the process of removing the backbone from the chicken before cooking, allowing you to be able to flatten the bird and roast it quickly. If you can't say the name without giggling, try "flat roasted" or butterflied."

Even with a roasted chicken, there are so many possibilities. You can eat it straight up, as soon as it is removed from the oven when the skin is its crispiest. In my house, many a wing and leg have been consumed this way. You can make a pan sauce. You can roast it with lemon slices under the skin. You can add dried fruit or potatoes in the pan. You can make gravy with the drippings. You can make a chicken bread salad. You can shred the leftovers for chicken pot pie. Or chicken salad. You can use the carcass to make chicken stock. 

And I know every grocery store sells a rotisserie chicken all wrapped up and ready to go, and sometimes it's the same price as a raw whole chicken (yet another example of how our food system is twisted). But I still say it's worth it to roast a bird yourself, for flavor if nothing else. First, it's almost inevitable that the meat on a store-cooked bird will be dry by the time you actually eat it. Second, you can't really control the amount of salt that goes onto the bird, and when I am roasting I often don't put any salt on at all. Third, you miss out on the drippings, which hold so much flavor.

Luckily with spatchcocking (there, I said it again), you can cut the cooking time drastically. Suddenly a roast chicken is well within the reach of a weeknight dinner. A loaf of bread and a salad, and there's your meal in under an hour, with leftovers to boot.

Fastest roasted chicken

1 whole chicken, between 3-4 pounds

Preheat the oven to 450 degrees F.

Pat the chicken very dry with paper towels. Turning the chicken breast side down, take a pair of kitchen shears and cut along both sides of the backbone to remove it.

Place an oven proof skillet big enough to fit the chicken on the stove on high heat. Spray with a thin film of canola oil. When the pan is hot, place the chicken skin side down in the skillet. After about 5 minutes the skin will start to brown. Place the pan in the oven without moving the chicken. Cook for 30-35 minutes, until the juices run clear and the thigh registers 165F using a meat thermometer.

Use a spatula to remove the chicken from the skillet and flip it skin side up to a plate that can catch the drippings, keeping as much of the skin on as possible. Place a piece of foil loosely on the top of the chicken and allow it to rest for 10 minutes before serving.

Even Faster Pan Gravy

While the chicken is resting, put the skillet back on the stove and heat on medium high heat. Whisk in 4 tablespoons of flour until incorporated, then add 2 cups of chicken broth or stock, one cup at a time. Continue whisking on medium heat until the gravy thickens, about 5 minutes. Before serving the chicken, tip any drippings that have collected on the plate into the gravy and incorporate. Add salt and pepper to taste.