Tuesday, March 5, 2013

Granola Goodness

OK, I’m about to let you in on a closely guarded trade secret. Several years ago, a friend shared her homemade granola with me, and it was love at first sight. She in turn had learned it from a friend decades earlier, and when I asked, my friend shared that recipe with me.

Being who I am, I can’t resist messing around with a good recipe in search of the great. After a lot of tweaking, I think I’ve found the perfect combination. I now make it all the time. I give it as a gift to anyone who will have it, and I try to keep some on hand at home at all times. I am happy to eat this granola with Greek yogurt and berries every morning for the rest of my days. (And speaking of Greek yogurt, the yogurt from Sophia’s Greek Pantry is truly the best in these parts).

Bags of small batch granola cost upwards of $8-$10, but you can make the most delicious granola imaginable for a fraction of the price. And it is all too easy to get hooked on this stuff — and I mean this in a good way, since it's filled with whole grains, antioxidants and protein. It’s simple to make, and doesn’t use many ingredients. The key is spreading the granola out in the pans so it can toast evenly, and using low heat so it won’t burn. The granola keeps in the freezer, and this recipe can be easily doubled (although you have to make sure you have the oven space to spread it over four sheet pans or bake it in two rounds). You can substitute various nuts if you want, but really, this is a pretty killer combination. Trust me on this one.


Really Truly The Best Granola Ever 
adapted with gratitude from Judith Liben
makes about 6 cups

3 cups rolled oats
1 cup raw pepitas
1/2 cup raw cashews, roughly chopped
1/2 cup raw almonds, roughly chopped
1 cup dried cherries (preferably unsweetened)

1/2 cup canola oil
1/2 cup honey
1/2 t. vanilla
1/4 t. kosher salt

Preheat the oven to 300 degrees. Spread parchment paper on two sheet pans.

Place oats, pepitas, and nuts in a large bowl. In a small saucepan, heat the oil, honey, vanilla and salt just until bubbles start to form. Remove from heat and pour over oat mixture. Mix to combine.

Spread mixture on the two pans in a single layer. Place in the oven. In the meantime, rinse out the bowl, dry it, and place the dried fruit in it.

After 12 minutes, remove pans, stir granola around, and rotate pans as you put them back in (unless you have a fabulously even cooking oven). Give the granola another 8-10 minutes, then start checking every few minutes. Total cooking time is about 25-30 minutes, depending on your oven.

When it is a medium golden color, remove from the oven. Pick up the parchment like a sling, and pour granola back into the bowl over the dried fruit. Stir to combine, then let cool on the counter, stirring occasionally.

Store in a zippered bag in the freezer or an airtight container on the counter. Will keep two weeks, or months frozen.


Monday, February 25, 2013

Averting The Green Slime

We all know we should be eating more greens, but do you know how to keep produce fresh at home? If you are busy, yet also interested in eating well, you may be faced with buying lots of produce only once a week. But that produce is good only if it actually makes it into your mouth rather than turning slimy in the fridge. So here are my best tips for how and where to store the fresh foods you bring home.

Buying: The first rule is don't overbuy. Don’t think you are getting a bargain buying four heads of lettuce or a flat of raspberries, unless you are planning on feeding a baseball team’s worth of eaters that same day. Moving large quantities of products makes money for the store, but this is key place where we consumers waste our food dollars. Buy what your house will reasonably eat, not what you hope will happen in some parallel universe.

Storing: Once the produce enters the house, it’s worth investing ten minutes to put each item in the right place and in the right form. In general, there are four choices: room temperature, dark and cool, cold and dry, and cold and moist. On the counter keep fruits and veggies that ripen, like bananas, pears, peaches, avocados, melons, and pineapples. Tomatoes should never be refrigerated. Once ripe, melons and pineapples can be cut into chunks and put in the fridge. Peaches and pears can also go in the fridge for a few days.


Most of us don't have root cellars anymore, but potatoes, squashes, onions and garlic will last a long time in a ventilated, cool, dark place. I keep those items in an open bin at the top of the basement stairs.

All other produce can or should be in the fridge. I keep my crisper drawers on low humidity. On one side, I put veggies like carrots, celery, ginger, cucumber, cabbages, broccoli, zucchini, and peppers. On the other, I keep citrus, apples, and grapes. A lot of advice givers say to put these items in a separate plastic bag. I'm no expert, but this seems like a colossal waste of plastic--I leave these items unbagged without any recourse.

For the most fragile produce like greens, lettuces and fresh herbs, some moisture helps keep them perky. I often wrap these items in damp cotton dish towels and place them on a separate shelf in the fridge. For prewashed greens and berries that come in ventilated boxes, I stick them in the fridge as is. But none of these items will last more than a few days, especially if they’ve been shipped from a far off land.

Eating: Eat the most perishable foods first. Once the counter produce ripens, use that. Save the root veggies, cabbage, and apples for meals later in the week, when you are at the farthest point from a grocery store run.I know this all sounds dull and complicated, but if you are trying to eat whole foods without preservatives, then these simple steps will save you money and help you eat well.


One side note. The best way to wash greens is not to rinse them in a colander but to submerge them in cold water. Use a big bowl or even a clean sink that holds enough water so that the leaves can move around. This allows the dirt to fall from the leaves. After about 10 minutes, lift the greens out of the water, leaving the dirt at the bottom. Dry the leaves by either spinning or wrapping in a dry towel.


Tuesday, February 12, 2013

Getting in the (Kitchen) Classroom


I feel pretty passionate about encouraging people to cook more at home. You don't need a lot of special equipment or ingredients to turn out delicious meals. But sometimes it's easy to let the lack of those things hold you back. And that's where a cooking class can help, because it forces you to put a knife in your hand and stand in front of a stove, maybe for the first time. This is especially true with kids. It's never too early to expose them to basic kitchen skills and an appreciation for food.
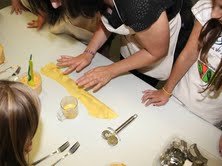
Luckily there are a number of resources for cooking classes in and around Arlington, for all ages and abilities. Kids Cooking Green, one of the organizations where I teach, is offering several classes for elementary school kids in three different Arlington schools this spring: Stratton, Brackett and Peirce. The focus is on discovering local food resources here in New England, and classes range from cheesemaking to pasta to crepes. Check out the listings here


Another great choice for kids, teens especially, is Tanya The Homestyle Gourmet. She does basics for kids and teens, plus special classes like sushi, baking, and snacks. She teaches just over the line in West Medford.
My alma mater, the Cambridge School of Culinary Arts, has a wide array of recreational classes for the amateur cook. The classes may seem pricey, but there’s a reason why the classes sell out almost every time-the chef instructors are top notch and facilities are great.
And finally, from the department of shameless self-promotion, I am launching a series of classes for adults starting in March. It's called Keys to the Kitchen: Basics of Home Cooking, offered at the high school through Arlington Community Education. The class will meet over six weeks and will focus on fundamental cooking techniques, healthy eating, and saving money at the grocery store. Think of it as boot camp for the home cook.
So get out there and get cooking!