Tuesday, October 21, 2014

Harvest Bars

Everything right now in Massachusetts is apples, apples, apples. With a few pears and pumpkins thrown in. Don't get me wrong ⎯ I love autumn in New England. I've picked pears, baked pumpkin cinnamon rolls, and made applesauce and apple crisp. I'm all in. But my family's first love is chocolate. And this week, we got a break from fall produce. 

About a hundred years ago (or perhaps closer to 25), I took a semester off from college to work on the staff at Gould Farm in Western Massachusetts. It is a working farm that also serves as a residence for guests with mental illnesses. Staff and guests live and work together, with the goal of helping guests learn to live independently. I learned how to milk cows, make yogurt, and tap maple trees, all while supervising guests. An amazing experience. 


Gould Farm also gave me one of my first exposures to the concept of eating locally, long before it was talked about the way it is now. One of my regular work rotations was cooking at the farm's cafe, which served breakfast and lunch to the public (and which still exists, I discovered). Among the many specialties of the cafe were massive, plate-sized blueberry pancakes made with the farm's eggs, milk, and syrup. I needed two spatulas to flip them. 

When I left, I copied one recipe from the cafe onto a 3 x 5 index card for a dessert called Harvest Bars. I don't know where the recipe came from, or why they are called Harvest Bars. In essence, the bars are a chocolate chip cookie with oats. But baking them in a pan means each bar is delectably chewy. I have returned to this dessert year after year, and the wear and tear on my index card is beginning to show. It's my go-to recipe when I need a quick dessert that is a crowd pleaser. I've made a few adjustments to the original ingredients and I've added cooking instructions, but this is pretty much as they were. I hope they are still being made at Gould Farm as well. 

Harvest Bars
adapted from Gould Farm Roadside Cafe
makes 12-15 bars

1 c. (2 sticks) unsalted butter at room temperature

1 c. brown sugar, packed
1 c. white sugar
2 eggs
1 t. vanilla
1 1/2 c. all purpose flour
1 t. baking soda
1 t. kosher salt
2 c. rolled oats
1 c. semi or bittersweet chocolate chips

Preheat the oven to 350 degrees F. 
Spray an 9 x 13 baking pan with cooking spray.

In the bowl of a stand mixer, cream butter and sugars together for 3 minutes. Add eggs and vanilla and mix until just blended. Mix flour, baking soda and salt together in a small bowl. Add flour mixture to the stand mixer and mix until just blended. By hand, stir in oats and chocolate chips. 


Spread the batter (it will be very thick) into the baking pan and bake until a tester comes out clean, 30-35 minutes. Allow to cool and cut into 12-15 
squares.


Tuesday, October 14, 2014

Weeknight Chicken with Flatbreads

I'm going to turn again to the topic of the quick weeknight dinner, but honestly, I find myself thinking about that subject a lot. Like pretty much every weeknight. The newest addition to our repertoire came about because of happy convergence of recipes and ingredients. 


Convergence #1: I discovered pomegranate molasses. Earlier this fall, I enjoyed two different dishes that included this magical ingredient. So I promptly bought some, without exactly knowing how I'd use it. It has a delightful sweet-tartness and is used to flavor to meats, dips and veggies.  My son would drink it straight up if I let him. 

Convergence #2: A friend visited recently, and as we flipped through Plenty, one of my favorite cookbooks, she pointed to a flatbread recipe and asked for a copy. After she left I thought: why aren't I making that? The recipe couldn't be easier, and the result is a fresh and delicious  ⎯  a true "quick" bread.  

Convergence #3: I bought myself a cast iron grill pan. I'm not going to digress and wax about cast iron again, but I'll find any excuse to use my new toy.  

A few weeks ago, I found myself staring at a few chicken breasts lingering in the fridge and wondering, once again, what's for dinner. And suddenly, all of these things came together into one really delicious meal without advance planning. Here's what I did: I made the flatbread dough. In the time it rested, I chopped cilantro, made the yogurt sauce, and sautéed the chicken (seriously). I took the chicken off the stove and poured some pomegranate molasses over it, and declared it done. Then, with kid help, we rolled and grilled the flatbreads. I put out a salad of torn greens, and, in about 40 minutes, dinner was served. It did help that I always have yogurt and cilantro around, since they both get heavy play in this meal.  Since then, we've made this exact meal two times. My family can't get enough of it. 


Flatbreads
adapted from Yotam Ottolenghi
makes 8 breads

1 1/2 c. all purpose flour, plus more for kneading and rolling
1 1/2 cup whole wheat pastry flour
1 t. salt
2 t. baking powder
1 c. Greek yogurt
1/4-1/2 c. milk
1/2 c. chopped cilantro (optional)
Vegetable oil for brushing the breads

In a bowl, mix together the flours, salt and baking powder until blended. Add the yogurt and mix, then add 1/4 c. of milk. Mix together, and add more milk if needed to make a thick dough. Turn the dough onto a floured surface, and knead briefly until it forms a coherent ball. Cover with plastic wrap and put in the refrigerator for at least 15 minutes, or up to an hour.

When ready to cook the breads, cut the dough into eight pieces. Roll each piece out on a floured surface until about 1/8-inch thick. If using cilantro, scatter approximately 1 T. of cilantro around each piece, fold in half, and roll out again.

Heat a grill or sauté pan on medium high heat. Brush the pan with oil, then brush one side of the dough with oil. Place dough in the pan, oil side down, and brush the top side with oil. Cook until bubbles form on top and the bottom is golden, about 4 minutes. Flip and cook other side until golden. Repeat with remaining dough. 

Fast Yogurt Sauce

1 c. Greek yogurt
1/4-1/2 c. chopped cilantro
1-2 garlic cloves, minced
2 T. extra virgin olive oil
1/2 c. cherry tomatoes, sliced in half, or diced cucumber (optional)
Kosher salt to taste

Mix all ingredients in a bowl. 

Pomegranate Molasses Chicken
serves 4

2 boneless, skinless chicken breasts
Kosher salt and ground pepper to taste
1 T. olive oil
2 T. pomegranate molasses
1/4 c. toasted walnuts (optional)
Chopped cilantro (optional)

Cut chicken into 2-inch chunks and sprinkle with salt and pepper. Heat olive oil in a large sauté pan on high heat. Add chicken and cook, moving frequently, until slightly browned on the outside and cooked through, about 5-6 minutes. Remove from the pan and place in a bowl. Add pomegranate molasses and stir.

If using walnuts, add walnuts to the same pan and cook on medium heat until browned, about 5 minutes. Remove with a slotted spoon. To serve, place a flatbread on a plate with a few pieces of chicken. Add yogurt sauce, chopped cilantro, and toasted walnuts on top. 

Thursday, October 2, 2014

The Many Delights of a Cast Iron Skillet, and a Recipe for Cornbread

How do I love thee, my cast iron skillets? Let me count the ways.

Cost: Good luck trying to pay more than $30 for one of any size. Plus, you can buy them at the hardware store. For the money, a cast iron pan simply cannot be beat.

Durability: People own their cast iron pieces for decades. And I have heard plenty of stories about the abuse that is heaped upon them, and yet they still are in use.

Non-stickiness: Forget teflon or whatever surface is the latest non-stick thing. After a few uses, the cast iron is non-stick. Really.

Flavor: Cast irons are excellent at conducting heat, which means the pans get hot and stay hot. And in general, heat brings flavor. These pans sear meat, brown crusts, and caramelize veggies better than any other pan I own.

Truth in advertising: here are the negatives. A cast iron skillet is heavier than most other pans. My 12-inch skillet definitely needs two hands, but I consider "cast iron lifting" part of my workout routine. And some cooks don't like how the handles get hot, but I'm acclimated to that as well. Besides, there are little silicone handle covers to help with that.

What do I cook in my cast iron? I sauté any ol' veggie I can, like green beans or carrots, using a small bit of oil and high heat. I roast chickens. This week I did a breaded pork chop. I cook fritters and pancakes and frittatas and grilled cheese sandwiches. Basically, my pans never get put away. They just sit on the stove since I use them almost daily.

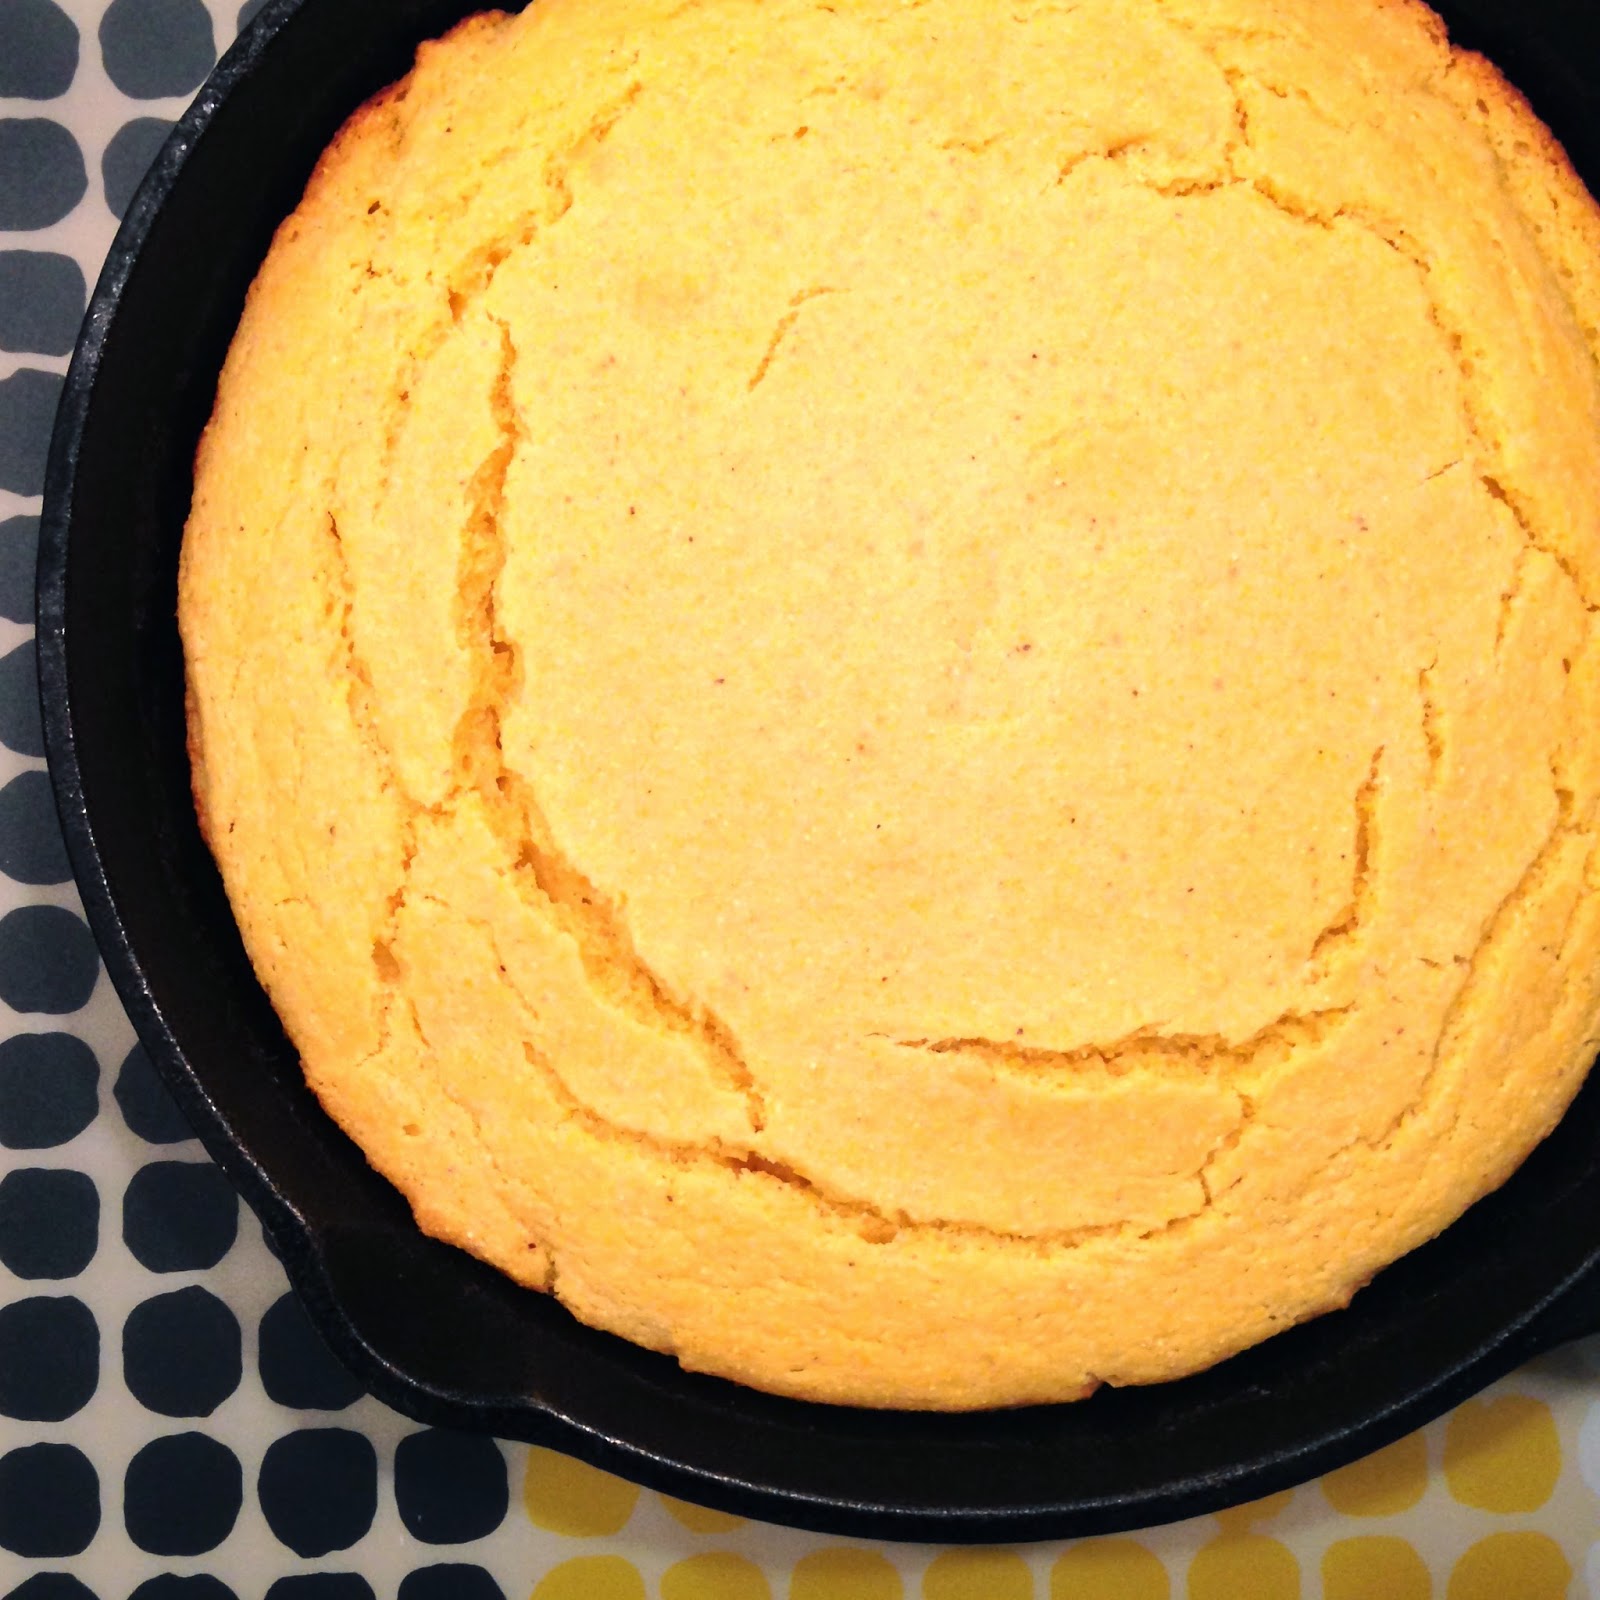
Cornbread is a popular side dish in my house, and baking it in the cast iron delivers a crusty outside and a moist inside. You can use an 8x8 baking dish for this recipe, but honestly, it's better in the cast iron. Trust me.

Corn gets a bad rap, but not all corn is turned into high fructose corn syrup. A whole grain cornmeal has a number of good things inside. This recipe is heavy on the cornmeal and light on the wheat flour for that very reason. 


Skillet Cornbread
adapted from Mark Bittman

1 1/2 c. yellow cornmeal (I use Geechie Boy Mill cornmeal when I can!)
1/2 c. flour (white or whole wheat pastry flour)
1 t. salt
1 1/2 t. baking powder
4 T. vegetable oil
1 1/4 c. buttermilk
1 egg
2 T. brown sugar
1 T. butter

Preheat the oven to 375 degrees F.

In a medium bowl, mix together the cornmeal, flour, salt and baking powder. In a small bowl, whisk together the vegetable oil, buttermilk, egg and brown sugar.  Add wet ingredients to dry ingredients, and mix until just combined.

Place butter in an 8-inch cast iron skillet and place on high heat. When butter is bubbling, swirl around the edges of the pan. Remove from heat and scrape batter into the skillet. Bake until bread is cracked and slightly browned, 25-30 minutes.

Friday, September 19, 2014

A Master Recipe for Risotto

People often ask me what we eat for dinner on weeknights. Like a lot of families, we are busy with work, kids, and that seemingly endless pile of laundry. And while I'm always looking for something new, risotto will remain in my dinner rotation for a long time. It's a forgiving recipe and always delicious. I start with a few core ingredients from the pantry, to which I add whatever fresh stuff I happen to have around. Here are two recent examples: one with sautéed mushrooms and peas, and one with chopped fresh tomatoes and parsley. 


Part of what I hope to do in this blog is to inspire readers to cook at home more often. I recently read this post from a blog called The Happiest Home, which argues that the key to weeknight peace is to spend more time in the kitchen, not less. Risotto is a good start. While it doesn't take hours to make, it is a dish that requires full attention. 

If you do your "mise en place" ahead of time, you will be an efficient risotto cook. "Mise en place" is key to restaurant cooking, and it means to put "everything in its place" before you start applying heat to your food. This practice benefits the home cook too. For risotto, this means that the broth is heated, the ladle is sitting in the broth pot, the ingredients are chopped, measured and waiting by the side of the stove. Because once you start stirring, you really can't stop. 

So make sure there are no diapers to change or kids to pick up from practice. This dish gives you a nice 20 minutes or so of meditative stirring, and the result is a delicious dinner. So pick a night when you are around, get the kids stirring, and enjoy.


Risotto Master Recipe
serves 4

3-6 oz. pancetta
1 T. olive oil
3 shallots (or 1 large onion)
2 c. arborio rice
1/4 c. white wine
7- 8 c. chicken or vegetable broth
salt to taste
1 c. grated parmesan or fontina cheese (or a combination)
1/2 c. chopped fresh parsley (optional)

Add in up to 2 cups of the following:
mushrooms sauteed in garlic
chopped tomatoes
peas sauteed in a butter and thyme
roasted squash or cauliflower

Dice pancetta and cook in a large soup pot on medium heat until browned. Remove with a slotted spoon onto a paper towel and set aside. While the pancetta is cooking, heat broth in a smaller pot. Keep it simmering on low and keep a ladle nearby.

Dice the shallots or onions finely, and place in a bowl by the stove. Measure rice, wine and cheese and place near the stove. Make sure any optional herbs or add ins are ready.

In the soup pot, add olive oil to pancetta drippings and heat on medium. Add shallots or onions and cook until softened, about 5-7 minutes. Add rice and cook, stirring, until the pieces are coated with the oil and are bright white, about 3 minutes (I had an instructor in cooking school who called the color you are looking for: "a whiter shade of white").

Add wine and cook off, then add 2 cups of broth to start. Stir, continuously, keeping the rice moving. The broth should be bubbling and the pan should be steaming--you want a vigorous heat but not enough to burn the bottom of the pan. As the broth gets absorbed, add more broth, 1 cup at a time.  If you are using unsalted broth, salt each time you add broth.

Repeat stirring and adding broth until rice is thoroughly cooked through. You are looking for the rice to be fully cooked and the consistency of the dish should be loose enough where the risotto spreads on a plate. Cooking time will be about 20 minutes depending on your stove, and you may not use all of the broth. Add additional broth at the end to ensure the risotto doesn't get too sticky, then turn off the heat and add the cheese. Taste and adjust for salt. Add optional herbs and toppings and eat!

Friday, September 12, 2014

Summertime Crostata

I'm starting to feel a slight sense of panic now that the last days of summer are closing in. I am buying so much corn my son, who usually loves corn, has started complaining. I eat tomatoes daily. The peaches are just coming in around here, and they are beauties. I like to can peaches, but a fresh fruit pie is one of the great joys of summer eating. 

So far this summer I've done sour cherry pies and blueberry pies in the more traditional pie plate. But sometimes I like a crostata, which you could also call a free form pie. It's forgiving both in terms of shape and amounts. And, as my daughter says, every bite has both crust and fruit. While a crostata looks stunning, I have found that peaches give off a lot of liquid when baked. As a result, a peach crostata can often be a soggy mess without the pie plate to rein it in. But then I read this clever trick on one of my favorite food blogs--strain the fruit beforehand! The results were delicious, minus the sog.


This photo was taken just before the crostata went into the oven. You get the idea. It was eaten up before I could take another photo. 

Summer Fruit Crostata
Serves 8 (leftovers are an awesome breakfast!)
Cream Cheese Pie Dough adapted from Rose Levy Berenbaum

1 1/3 c. all purpose flour (can substitute 1/3-1/2 cup with whole wheat pastry flour)
1/2 t. salt
8 T. unsalted butter, cold and cut into several chunks
3 oz. cream cheese, cold
2 T. cold water + ice to make 3 T. total
2 T. apple cider vinegar
5-6 peaches, nectarines or plums, cut into about 2 inch chunks
2 T. sugar
2 T. flour
1 t. salt
zest of 1/2 lemon
1 egg, beaten 
sugar for sprinkling

In a stand mixer, place flour and salt. Mix to blend. Add butter and cream cheese and mix until the dough looks shaggy and some butter chunks are the size of walnuts, about 1 minute. Add water and vinegar all at one and mix until the dough just comes together, about 30 seconds.

Turn the dough onto a clean, floured surface and press with the heel of your hand a few times. Gather it together into a rough circle, cover with plastic wrap, and chill in the fridge for at least one hour (and up to one day).

When you are ready to bake, preheat the oven to 375 degrees F. Place cut fruit and sugar into a strainer over a bowl and let sit for 1/2 hour. Then mix in the flour, salt and lemon zest. 

Take out dough and place on a clean, floured surface. Roll until about 14 inches in diameter. Place dough circle on a sheet pan covered with parchment. Place fruit mixture in the center of the dough, leaving about one inch of dough uncovered around the edge. Fold edge over the fruit, then brush edge with beaten egg and sprinkle with sugar.

Bake until the crust is browned and the fruit is bubbling, 30-40 minutes.

Tuesday, September 9, 2014

Tomatoes Tomatoes Tomatoes

Tomato season is like the Halloween of the harvest calendar, a time to gorge for what feels like a very short time. We are having a great tomato year here in New England, and it appears to be going strong for a few weeks yet.

Last week I was faced with a boatload of nature's candy from my CSA: ten pounds of heirlooms and three quarts of cherry tomatoes. Plus a few pounds of tomatillos (which aren't related to tomatoes but I put them in the same culinary bucket). I have lots of recipes I try to hit at least once a summer, like gazpacho, BLTs, tomato basil soup and tomato corn salad. But to mix things up, here's what I did last week. First I roasted some:


Then I made my favorite tomato sauce:


Then I brought a caprese salad to a barbecue:


And you know what? That took care of all my tomatoes and suddenly, I needed more. What I like about the roasted tomatoes and the sauce is that both can be frozen and brought out on a cold winter day. Like many good tomato dishes, you don't need a recipe for caprese, which is a mixture of tomatoes, basil and fresh mozzarella with some salt, pepper and good olive oil. But here are the other two recipes. Put them in a safe place, because come tomato time, you'll want to use them.

Roasted Tomatoes

Tomatoes, sliced about 1/4-1/2 inch thick
kosher salt
ground pepper
olive oil
thyme leaves (optional)

Preheat oven to 400 degrees F. Lay tomato slices in a single layer on a baking sheet covered with parchment. Sprinkle with salt, pepper, oil and thyme. Roast in the oven until slightly browned and bubbly, about 40 minutes.

Roasted tomatoes can be frozen at this point, then used in soups and sauces. Or for a decadent appetizer you can bake a puff pastry sheet until golden, then top with a single layer of the roasted tomato slices. Add a dollop of mascarpone and a basil leaf on top of each tomato.

Tomato Butter Sauce
adapted from Marcella Hazan

2 pounds tomatoes, chunked
1 onion, peeled and cut in half
4 T. butter
kosher salt to taste
1/4 c. sliced basil leaves (optional)

In a sauce pan, place tomatoes, onion halves, and butter. Heat on medium heat until bubbling, then lower to a simmer and cook until onion is soft, about 45 minutes. Remove onion halves and discard. Puree sauce with an immersion blender. Add salt to taste and basil leaves.

The sauce can be easily doubled, and it can be frozen. Use on pasta, pizza or lasagna.

Thursday, August 14, 2014

Summer Rolls for Summer Days

Near my house is a cafe that has seen several incarnations over the past fifteen years. The good, bad, and the indifferent have all existed in the space, which is on prime real estate in our commercial center and, amazingly, has parking. The most recent business to open there is Kickstand Cafe, and it seems that form and function have finally merged. The food and coffee are great and the atmosphere is lovely. I should know since I camped out there quite a bit while my house was under construction. 

One of the first things I tried at Kickstand was their summer rolls, and I was instantly hooked. Really hooked. And even though the rolls are inexpensive, the cost of eating them so often was mounting up. So while I'll never give up on Kickstand, I have started making summer rolls at home too. 


Summer rolls are delightfully easy to make, and (mostly) do not involve turning on any hot appliances during these hazy summer days. OK, I do roast tofu, but because that can be done ahead of time I pick the least hot moment to turn on the oven. Once all of the ingredients are in bowls, the assembly goes quickly.

One thing I try to mimic closely from Kickstand is their peanut dipping sauce. This sauce may, in fact, be the reason for my obsession with this dish. Without knowing Kickstand's ingredients, I bumbled along and created a reasonable approximation that is quite worthy of savoring all by itself on a spoon.


Summer Rolls with Peanut Dipping Sauce
makes 16 rolls

For the sauce:
1/3 c. smooth peanut butter
1/3 c. hoisin sauce
1/3 c. water, plus more if needed
the juice from one lime
kosher salt to taste
siracha or other hot sauce to taste

In a bowl, mix the peanut butter, hoisin, water, and lime juice until smooth. Add additional water to make the sauce pourable (but still thick). Add salt and hot sauce to taste. Set aside.

For the rolls:
1 14 oz. package firm tofu
cooking spray
kosher salt to taste
6 oz. thin rice noodles (also called mai fun or vermicelli)
2 carrots, grated fine
1 T. rice vinegar
5 pieces of romaine or leaf lettuce, sliced into 1/2 inch strips
1 cup mint leaves, packed
1 cup cilantro sprigs, packed
16 rice Spring Roll Skins (found at Whole Foods or Asian Markets)

Preheat oven to 375 degrees F. Slice tofu into 1/2 inch slices and place on a baking sheet covered with parchment. Blot tofu dry with paper towels, then spray lightly with cooking spray and sprinkle with salt. Roast until tofu is lightly browned, about 30 minutes. Let cool (tofu can be refrigerated at this point for up to one week). 

Place rice noodles in a bowl. Pour boiling water over them and let sit until tender, 3-4 minutes. Drain and set aside. 

Toss grated carrots with rice vinegar in a bowl and set aside. Place lettuce, mint, and cilantro in separate bowls. Cut tofu into sticks. Line up the noodles, tofu, carrots, lettuce, and herbs around a cutting board. 

Place spring roll skins near the cutting board. Fill a pie plate or shallow bowl with lukewarm water and place next to skins. One at a time, submerge a spring roll skin into the water until softened, about 10-15 seconds. Remove skin and place on the cutting board. Add some of each of the ingredients to your liking in the middle of the skin. Fold the top over the ingredients, then the sides, then roll it towards you tightly to seal the roll. Place on a plate or a container lined with wax paper, taking care that the rolls don't touch each other. Repeat with remaining ingredients.

Serve with dipping sauce. 

Thursday, July 17, 2014

Carbonara in a New Kitchen

We just wrote the last check for our kitchen renovation today. Today it's done. Frankly, we've been functioning in the space for a few weeks now, but today feels momentous. It's been quite the roller coaster ride to renovate a kitchen while continuing to live in the same house. Don't get me wrong, I am so grateful we have the opportunity to renovate the space. But I'm also happy to move onto the next phase. Here is a quick tour before things get too messy to snap photos.


We chose a galley layout, which in the end is one of the most efficient kitchen systems. There's no triangle that crosses the room; instead, everything flows along the line from refrigerator to sink to stove to dining room. It's been working great, and it's wide enough to accommodate more than one cook on each side. Along that line, we have a ridiculously powerful six burner stovetop. Which we will use a lot. I've already discovered it's so powerful some of my skillets can't handle the heat.


Off in a corner between the kitchen and living room we created a new desk area, with room for my embarrassing collection of cookbooks. This not only gives me a workspace close to the kitchen action, but it frees up our existing desk space for the ever increasing computer needs of my children. They get the desktop in the living room (with the screen facing me, thank you very much), and we put a new laptop in the kitchen desk area.

But beyond function, we had fun picking out some visual bling. We chose a gray glass subway tile for the backsplash. So inexpensive and so stunning. The woven pendants over the island are recycled telephone wires. Isn't that cool? And finally, a red barn door. Who cares if it's functional or not, it's just awesome.

 
Since we settled in a few weeks ago, we've been deciding where to put what and cooking as much as we can. We've baked pies, cooked zucchini fritters, and made popovers. All things we missed in our living room kitchen. But one simple pleasure that has come back to us is pasta. Pasta was surprisingly hard to pull off in the living room. For several weeks we did our dishes in the basement, and it just didn't seem worth the effort to go down a flight of stairs to drain the pasta water. So the other night we made carbonara, a delightful yet easy dish. Sometimes it's the simple things that are missed most of all.


Pasta Carbonara

1 lb pasta
4-6 pieces of bacon
1/2 small onion, diced small
1 c. peas (thawed if frozen)
3 eggs
3/4 c. parmesan cheese, grated
1/2-1 c. pasta water
kosher salt and pepper to taste
Flat leaf parsley, chopped
More grated parmesan for topping at the table

In a skillet, cook bacon until crispy. Remove and drain on a paper towel. When cool, crumble bacon into small pieces. Cook onion in the bacon fat on medium heat until softened, about 8-10 minutes. Remove onions with a slotted spoon and set aside with the bacon.

Cook pasta in a large pot of boiling, well-salted water. While the pasta is cooking, in a large serving bowl, mix together the eggs and parmesan with a whisk until blended. Just before draining the pasta, scoop out 1 cup of pasta water and set aside.

Drain the pasta, and while it's still hot, add to the serving dish. Working quickly with tongs, mix pasta  and 1/2 cup of the pasta water thoroughly with the egg mixture (this allows the egg mixture to cook and evenly coat the pasta). Add bacon, onion, and peas and mix well. Add a bit more pasta water if it seems that the pasta is sticky.

Place pasta in a bowl, top with parsley, and eat immediately.

Wednesday, May 14, 2014

Living Room Chili

As we enter week three of our kitchen redo, lots of folks are asking what a cook like me is doing without a kitchen in which to cook. Answer: find another place to cook. My only option right now is the living room, which presents challenges. Where to put everything, where to plug everything in, and most importantly, where to wash the dishes. For about a week and a half our only choice for dish washing was the bathtub. Not surprisingly, we ate out a lot that week. But our amazing contractor has rigged up a temporary sink in our bombed out kitchen, which opens up lots of possibilities.


Where our beautiful new double oven will be. Eventually.

For the food prep, we are relying on a collection of counter appliances to get the job done. The microwave, toaster oven, coffee maker, blender, slow cooker, and rice cooker are all present and in use. The only item we purchased specifically for the living room was an electric burner, which cost all of $18 and has completely expanded our possibilities. 

Don't get me wrong--we are definitely buying more from the Trader Joe's frozen aisle, and the kids talked me into Eggo waffles (one glance at the ingredient list has convinced me not to buy Eggos anymore). But we've managed to cook fair amount. Last week we cranked out honey orange chicken in the slow cooker, burgers on the grill, and pasta with pesto. 

The living room set up. 

After a class a few days ago, I came home with leftover black beans and cilantro. My daughter took one look at them and requested chili. Actually, she specifically requested the chili my friend Lisa makes for an annual camping trip we take in the fall (does my daughter think we are camping?). Lisa told me she uses a Cooks Illustrated recipe, which I checked out and promptly altered substantially. In the end, my recipe isn't cutting edge, but a simple chili tastes so good when done right. 

Chili is perfect for the slow cooker, but you can't rely only the slow cooker to get the job done. I use a sauté pan to brown the meat, soften the veggies, and wake up the spices, but washing that extra pan is worth it in terms of flavor. Even on the $18 burner that step only took about 10 minutes, and then the chili can manage unsupervised in the slow cooker for the rest of the day. If I can make this in the living room, surely you can make this in an actual kitchen.

One note. I think part of what makes this chili so delicious is the spices I used. I don't use a traditional chili powder mix, which is often a combination of many herbs and spices. I start with Penzey's ground ancho chili pepper, which is just the chili. Ancho has high flavor but not a lot of heat. Use cayenne if you must have spicy heat, but I personally like the ancho flavor all by itself. 


Living Room Chili
Serves 4 with leftovers for lunch

1 T. olive oil
1 medium onion, finely chopped
1 red bell pepper, finely chopped
3 T. ground ancho chili pepper
1 T. ground cumin
1 T. oregano
1/2 t. cayenne pepper (optional) 
1 lb. lean ground beef (or bison)
2 cloves garlic, minced
1 15 oz. can black beans, drained and rinsed
1 c. corn kernels
1 28 oz. can diced tomatoes
1 15 oz. can tomato sauce
Kosher salt to taste

Toppings, if you have them: chopped cilantro, chopped scallions, sour cream, feta cheese, avocado slices, or lime wedges.

Heat oil in a sauté pan until shimmery. Add onions and red pepper and cook until soft, about 5 minutes. Add chili pepper, cumin and oregano and stir. Add beef and brown, about 5 minutes. Add garlic and stir briefly. 

Scrape contents of pan into a slow cooker (at least a 4-quart). Add beans, corn, tomatoes and tomato sauce and stir. Set slow cooker to low and cook 6-8 hours. 

Taste for seasoning and add salt to taste. 

Serve with toppings. 

Wednesday, May 7, 2014

Monkeying Around

I love baking. The ingredients, the process, the gadgets, and definitely the outcome. But now I am in the midst of a gut renovation of my kitchen. Which is wonderful, don't get me wrong. I've been living with a highly dysfunctional, unattractive kitchen for eight years. Think cow and goat wallpaper and wood paneling on the ceiling. Seriously. Plus a big honking stove that looked (and acted) like something Laura Ingalls Wilder would have cooked on. Our new space will be airy, bright, open to the dining room, and most important to me, extremely functional. I cannot wait, but for the next few months, baking is off limits. Our temporary cooking space in the living room includes a microwave, toaster oven, and double electric burner, but no oven.

For my last baking act in the old kitchen, I chose (or my kids chose) monkey bread. It's a favorite in our house, and I confess that for a while we were making monkey bread every weekend. What is Monkey Bread, you ask? It's a yeast bread confection baked in a bundt pan that one of the best examples of accessible home baking. It's a do-ahead recipe that uses few ingredients and kids can help. It's also a crowd pleaser, and the results are so marvelous it usually doesn't have time to cool before it's gone. 

This recipe borrows heavily from Smitten Kitchen, which is one of my favorite food blogs. But I changed quite a bit. I nixed the cream cheese glaze, which I did think was overkill in the sweetness department. I altered the recipe to set is up the night before, so when you wake up in the morning you can just preheat the oven and stick it in. And while Smitten Kitchen claims this serves 8+ eaters, I beg to differ. The four of us at my house, for better or worse, can easily make one of these disappear.


Monkey Bread
adapted from Smitten Kitchen
serves 4-6

2 T. + 6 T. butter, divided
1 c. milk
1/3 c. water
1/4 c. sugar
2 1/4 t. instant yeast
3 1/2 to 4 c. all-purpose flour, plus more if needed
2 t. salt
1 1/4 c. packed brown sugar
2 1/2 t. cinnamon

Place 2 T. butter, milk, and water in a heat proof measuring cup. Heat in microwave in 30 second intervals until the mixture feels lukewarm (or gently warm in a pan on the stove). Add sugar and yeast and mix. Let sit for a few minutes. 

Mix 3 1/2 cups flour and salt together in the bowl of the stand mixer fitted with the dough hook. Turn on the mixer and slowly add the milk mixture. As the dough comes together, if it sticks to the bowl, turn off the machine and add additional flour, 1/4 cup at a time. Once the dough comes together enough so it isn't sticking to the sides of the bowl, stop adding flour. Mix on medium high until the dough is smooth, around 7 minutes (be careful to stay near your mixer as it works-it tends to jump around the counter when kneading). You can also knead the dough by hand if you need a good arm workout.

Turn the dough onto a clean lightly floured surface to check. It should form a smooth ball and spring back to the touch. If not, continue kneading by hand until it's springy and smooth. Spray the mixer bowl with cooking spray, and place the dough back in it. Cover and let rise in a warm place until the dough has doubled in size, about one hour.

Coat a bundt pan with cooking spray. Melt the remaining 6 T. butter and place in a bowl. Mix the brown sugar and cinnamon in another bowl.

Turn the dough onto a floured surface. (Kudos to Smitten Kitchen's technique here.) Gently roll the dough into an 8-inch square. Using a bench scraper, divide the dough into about 64 pieces (8 x 8). Start cutting in the middle and work out. If the pieces aren't even, don't worry. Just combine a few of the smaller pieces as you work. 

Line up an assembly line with the butter, sugar, and bundt pan. Roll each dough piece on the counter to form a ball, then dunk it in the butter, then roll it in the sugar, then drop it in the pan. Repeat until all the dough is used up (this is where kid hands come in handy). Sprinkle any remaining sugar on the top. Cover the pan and place in the fridge overnight. (You could also let it rise immediately for another 30 minutes, the proceed with baking).

Remove pan from the fridge. Preheat the oven to 350 degrees F. Remove cover and bake until the top is browned and the sides are bubbling, 30 to 35 minutes. Remove from the oven and let cool for 5 minutes. Take a deep breath and turn the bread out onto a platter. Try to let it cool slightly, or just dig in! 


Thursday, March 13, 2014

Rarebit, Not Rabbit

Yes, I've been to cooking school. Yes, I think about food a lot. But still, on some weeks, I manage to run into the "it's 6 o'clock and I don't know what's for dinner" sand trap. The dinner blues are simply a condition of modern family life. I have many strategies to try to avoid that situation. I plan meals ahead of time, cook on the weekends, and start dishes in the morning. But sometimes, I run out of time or ingredients or both, and suddenly dinner time is staring me down and I have nowhere to hide.

So what to do? Sometimes, takeout. But too much takeout costs, both in terms of dollars and health. I'm not saying we don't do it, I'm only saying I like to use takeout as a last resort. If I can, I pull out an idea from a very small but valuable cache of recipes: the 10-minute meal that uses a few common ingredients. And one of these gems is Welsh rarebit.

What is a rarebit? And why is it sometimes called a rabbit when no rabbit is consumed? Is it really Welsh? Welsh Rarebit a classic British Isles dish with a long history. And even though there are Scottish Rabbits and maybe even Irish Rabbits, the dish comes down to something pretty simple: cheese sauce on toast. There are infinite variations, but cheese and toast must be involved. And that's part of why this dish makes it into our rotation regularly. We are a house that always has cheese and always has bread.


I hesitate to even write about a concept so simple as cheese and toast. It's not like I'm whipping up a roasted veggie lasagna with homemade pasta. But even cheese on toast has you coming out ahead of takeout in terms of both cost and nutrition. In any case, my kids prefer Welsh rarebit to that famed other cheese and bread combos, pizza. The mustard and Worcestershire sauce in the rarebit elevate the flavor, and it's comforting on cold days (which we are still experiencing here in the Northeast).

Welsh rarebit is also an excellent vehicle to move vegetables and leftovers out of the fridge and into the bellys. We've had it with sausage and apples, squash, potatoes, bacon, eggs, steak, and in the most recent incarnation pictured above, roasted cauliflower and green beans. I know I'm not alone in this, but we as a family could stand to eat more vegetables, and if a cheddar sauce helps that process along, I'm all for it.

This recipe is pretty much ripped off straight from my mother, as are so many of my dishes. The traditional version is made with beer, but I make mine with lowfat milk. In terms of process, there is really no way to mess this up. Everyone in my house, including my kids, has their own way of making the sauce, and it always comes out delicious.

Welsh Rarebit
from Carole Brown
Serves 4-6

1 c. cold milk
1 t. dry mustard
1 t. Worcestershire sauce
4 t. cornstarch
pinch of salt
2 c. grated cheddar cheese, packed (about 1/2 lb)
4-8 pieces of bread, preferably whole wheat or sourdough

Optional: cubes of sausage, bacon, or steak; a poached or fried egg; cooked broccoli, cauliflower, green beans, squash, potatoes or apples; carmelized onions.

Put milk in a small saucepan. Add the mustard, Worcestershire sauce, cornstarch, and a pinch of salt. Whisk until combined. Heat mixture until it starts to thicken, about 5 minutes. Add cheese and continue to whisk until cheese is melted, about 1 minute. Remove from heat. Continue to stir every few minutes as you prepare the rest of the ingredients.

Heat or cook any optional toppings. Toast bread to desired toastiness.

Place bread on a plate, add any optional toppings. Ladle sauce over toast and toppings. Eat immediately.

Friday, February 14, 2014

Chocolate Sablés for Valentine's Day

Valentine's Day, more than any other holiday, is considered sacred in my house. Why? Because my house is the temple of chocolate, and its inhabitants are the most devout of followers. Chocolate is always, I mean always, the dessert of choice. Chocolate mousse, chocolate tarts, chocolate truffles, chocolate malts, chocolate fondue. Need I go on? Every so often, I throw up my hands and make a fruit-based dessert, but I usually get the business from my family when I do.

Sometimes I think there's no point in looking for a new chocolate cookie. I already have the best salted chocolate cookies, chocolate oat harvest bars, and brownies in my repetoire. But a recipe for chocolate sablés caught my eye as I was leafing through The Essential New York Times Cookbook.

A sablé is a butter cookie, and come in many flavors, sweet or savory. "Sablé" means sand in French, which alludes to the desired texture. In the great American cookie consistency debate--chewy vs. crunchy--this cookie is....neither. Instead a sablé is light but not brittle, soft but not squishy. The dough isn't too far off from a pastry crust, with a large amount of butter and little liquid.

I fiddled with the New York Times recipe (mostly because I just can't help myself). I cut the sugar and added an egg, which may be cheating, but found the dough came together so much more quickly with just one egg to bind it together. I also could not resist sprinkling a bit of sea salt on the cookie before baking. It may be a fad to sprinkle salt on desserts, but it's a fad I wholeheartedly support.

And while you can roll this dough into a log and slice it into rounds, I like rolling it out flat and using cookies cutters, because then you can pick your shape (even though the ones below are, in fact, round, they have fluted edging). This method does mean you must re-roll some of the dough, or waste some dough. And while many frown upon re-rolling such delicate dough, I'm going to admit I've never been able to tell the difference between cookies rolled once or twice.

This recipe makes a lot of cookies, and you can hold the dough in the fridge for several days, making it ideal party fare. Which is exactly how I used it recently to rave reviews.

Before I get to the recipe, you might wonder what are the typed words underneath the plate of cookies? Well, it may just be the best gift ever. A friend secretly worked with my mother to obtain some of my grandparents' original recipe cards, which she then photographed and transferred to tea towels. Isn't that cool?


Chocolate Sablés
adapted from The Essential New York Times Cookbook

1 1/4 c. flour
1/3 c. cocoa
1/2 t. baking soda
1/2 t. kosher salt
11 T. unsalted butter, at room temperature, cut into large chunks
2/3 c. packed dark brown sugar
1 egg
1 t. vanilla extract
5 oz. bittersweet chocolate, grated (or finely chopped)
sea salt for sprinkling

Sift flour, cocoa and baking soda together into a bowl. Add salt and stir.

Put butter in a stand mixer bowl. Using the paddle attachment, beat butter on medium speed until creamy, about 1 minute. Scrape down if needed. Add sugar and beat for another minute. Add egg and vanilla and beat until just incorporated. 

Turn off the mixer and add the dry ingredients. Beat on low speed until just incorporated. Turn off again, add the chocolate, and mix in. 

Divide the dough into four pieces. Roll each piece between two sheets of wax paper until 1/2 inch thick. Place sheets into the refrigerator for 1 hour, up to to 4 days.

Preheat the oven to 350 degrees F. Take the rolled dough out one sheet at a time. Peel away the top layer of wax paper and discard. Using cookie cutters, cut into desired shapes. Place on parchment paper on a baking tray, leaving 1 inch of space between each cookie. Sprinkle a few pieces of sea salt in the middle of each cookie.

If there is dough left over, you can gather together, re-roll and cut more cookies. 

Bake for 11-12 minutes. They may seem soft but they are done. Let them cool on the parchment on a rack. 

Store in a container at room temperature for up to 3 days. 

Thursday, January 9, 2014

Stocking the Freezer When It's Freezing Out: Bolognese Sauce

Happy New Year! My New Year's resolution is simple: to post more blogs. Did anyone notice how I fell off the blogosphere? While the good news is I did a lot of teaching this fall, the bad news is if I'm teaching more, I'm writing less.

But I'm back and have a long list of recipes I want to share. Having grown up in the Midwest, I am feeling this cold weather snap acutely. And when it's cold outside, I focus on slow cooking inside. Chili, stew, soup, sauce—these are the mainstays of my family's winter diet. And a good sauce Bolognese is up there in the pantheon. 

Did my Italian grandmother cook red gravy every Sunday? No. Am I even Italian? No. But I love a simple pasta Bolognese.  There are as many variations to the ingredients as there are cooks: using beef, using veal, using pork, using a combination of veal and pork, using ground meat, using whole pieces of chuck, adding mushrooms, celery, or sun dried tomatoes, swearing by fresh tomatoes instead of canned, using milk, not using milk, using broth, not using broth, using red wine, using white wine, adding parmesan, seasoning the sauce with thyme, basil, or oregano. I've synthesized the best of the recipes I've used to make my version, which is always tucked away in the freezer at our house.

Chances are you have most of these ingredients around, and maybe you have a few hours some weekend day when some kind of game is on. The recipe spreads out the cooking over two days (it usually tastes better the next day), but it can easily be done in one. So get this on the stove. And if you decide to throw in some mushrooms, I'm not going to stop you. 


Long Cooking Bolognese
Makes about 12 cups

2 T. olive oil 2 to 2 1/2 lb beef, chuck, trimmed of excess fat and cut into about 1-2 inch cubes
2 medium onions, diced
2 medium carrots, diced
2-3 cloves garlic, minced
2 bay leaves
1 t. oregano
1 c. red wine
3 28 oz. cans tomatoes (whole peeled or diced)
1 c. broth (chicken or beef)
1 c. milk (low fat is fine)
kosher salt and ground pepper to taste

Place olive oil into a large soup pot and heat on medium high. Heat until oil is shimmery, then begin browning meat cubes in batches (you don't want them to be crowded in the pot). Brown all sides of the meat, then remove pieces to a bowl. Repeat until all meat cubes are browned.

Add onions and carrots to the pot. Cook for about 10 minutes, until the onions are translucent and softened. Add wine and stir up the browned bits in the pan. Add minced garlic, bay leaves, oregano, tomatoes, and meat back into the pot. Heat until just bubbling (not a hard boil), and then simmer for 3 hours, stirring occasionally.

Take off the heat and cool, then place in the fridge overnight.

Remove from the fridge. Spoon off any fat that has congealed on the surface and remove the bay leaves. Remove pieces of meat from the sauce, and use your hands to shred into small pieces. If desired, use an immersion blender to blend until desired thickness (I like mine thick but with pieces of carrot and tomato still visible). Return meat to the pot and add the broth and milk. Heat on medium heat until just bubbling, then simmer, uncovered, for one hour, stirring occasionally. Add salt and pepper to taste.

Will keep in the fridge for 2 weeks or in the freezer for 3 months.